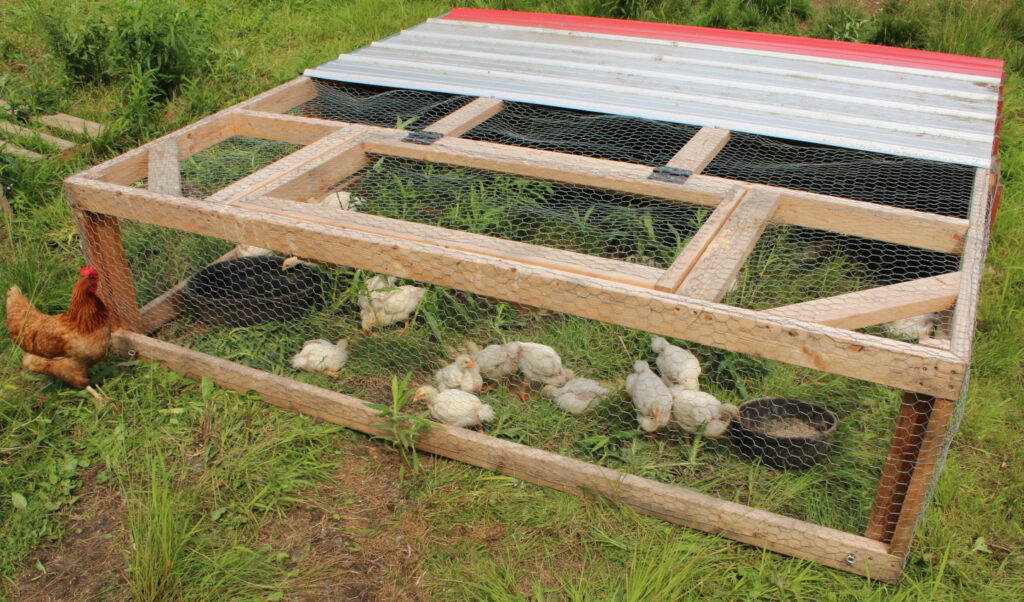
Learn how we made our DIY Chicken Tractor for our meat birds. It is a very simple design, you can easily make this in a weekend. This chicken tractor is inspired by the tractors Joel Salatin uses.
Why we chose this DIY Chicken Tractor design
My husband and I have been following along with Joel Salatin’s YouTube videos as well as reading his books. He has a very successful pasture raised farm and has been farming for about 30 years. We think he has a really good idea of how to do things efficiently.
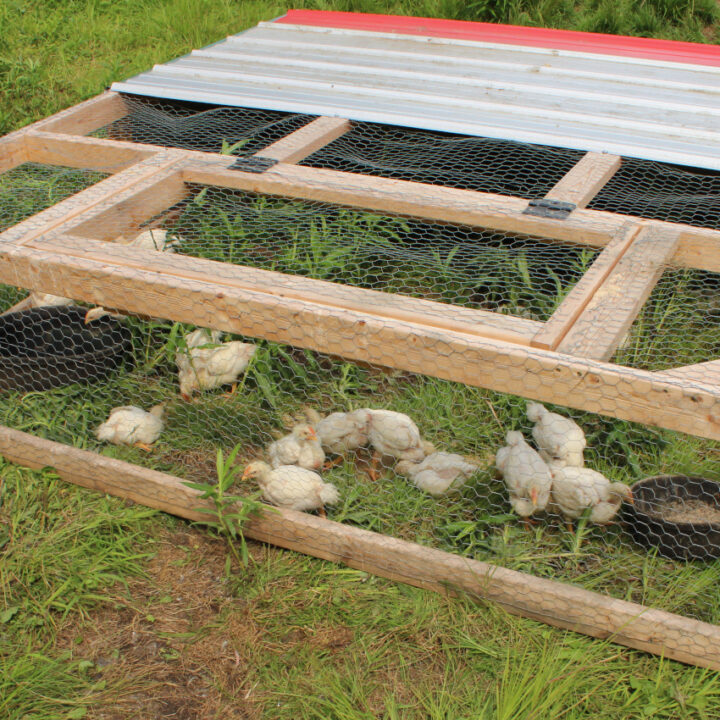
We felt that the chicken tractor he uses works perfectly for meat chickens. It gives them shelter from the rain and shade from the sun but provides an area if they choose to lay in the sun.
This size chicken tractor can fit up to 40 birds. Some people go with 1.5 square feet per chicken and some give 2 square feet per chicken. We decided to go with 2 square feet.
We wanted to give them a bit more space with this being our first batch of meat chickens. We also wanted to keep our options open, so if in the future we wanted to do more then 26 meat chickens, we have that option.
We also like this design because it isn’t tall. You don’t have to worry about it tipping over if we are on a hill side when moving it. Also this breed of bird tends to not roost due to the rapid growth and the larger breast meat. Since they do not roost we have no need to go any higher then 2 feet high.
Tips for making your DIY Chicken Tractor
- I would recommend aluminum roofing if you have the option, since it is much lighter and will make it a lot easier to move your tractor.
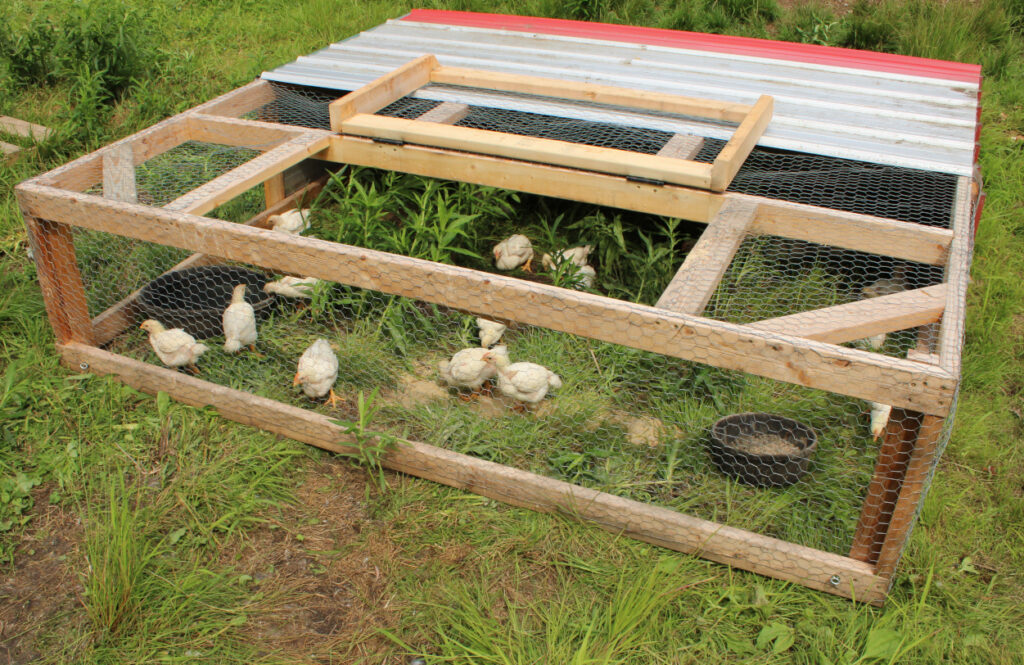
- You can customize this to what ever you would like. This seems to work fine for us. Some people make the whole roof into one that can be lifted up on one side and others make only half the roof a door.
- If you decide to make the whole roof the flip up door you will need more 8 foot boards so you can add that on top of your frame.
- Use a Speed Square- this will help make sure that your frame stays square during the building process.
- We were able to keep costs down by using supplies that we had on hand or from family members.
- When moving the chicken tractor you could use a dolly. If you find that it is a bit too heavy or difficult to move, the dolly will give you just a bit of leverage with the wheels to easily move it to a new spot. Just slide under the back end of your chicken tractor and pull on the other side with the rope.
Supplies Needed
For this chicken tractor we used tin roofing so it does add a bit of extra weight to the tractor. I am still able to move it, though I do have some difficulty. We used the metal roofing because it was what we had on hand.
We also had some chicken fencing that we had already, this has 1 inch holes and is 2 feet tall. This was used to wrap the south facing sides. We also used this for the top by overlapping it a bit and then connecting the two together with some metal ties, zip ties would work as well.
- 10 – 8 foot long 2″x4″ boards
- 3 inch screws
- Screw gun
- Miter Saw
- Aluminum or other metal roofing
- Tin snips or cut off wheel with an angle grinder
- Chicken fencing with 1 inch holes and 2 feet tall
- Heavy duty stapler and staples
- Handles
- Eye Hooks
- Heavy duty carabiners
- 12 foot long rope
How to make a DIY Chicken Tractor
Making the Frame
Make your 8 foot by 8 foot frame out of the 2×4 boards.
Attach your 2 foot vertical corner support boards on all four corners then build your second 8 foot by 8 foot frame at the top of the corner support boards.
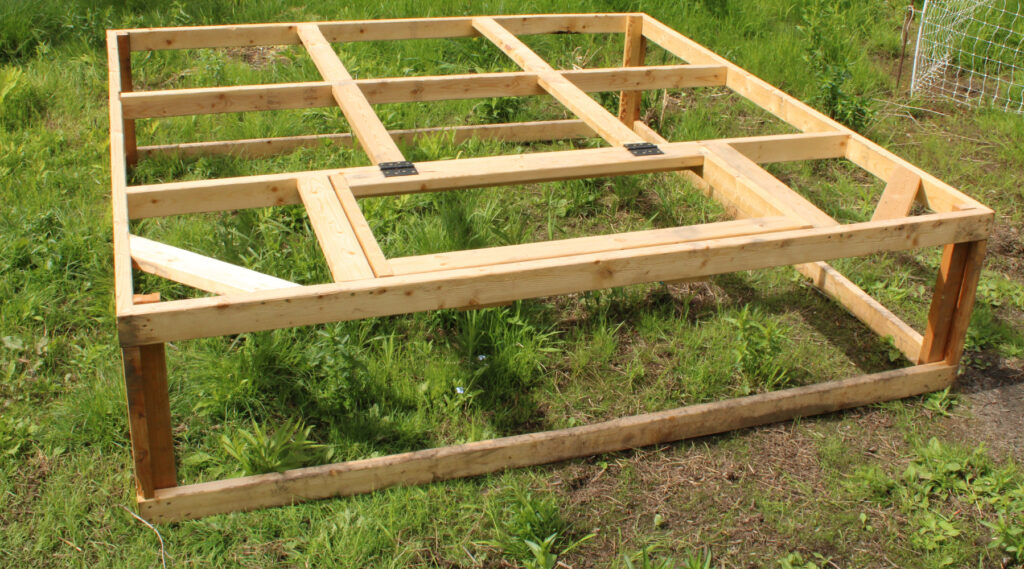
Add your horizontal corner support boards to each top corner to keep the chicken tractor square.
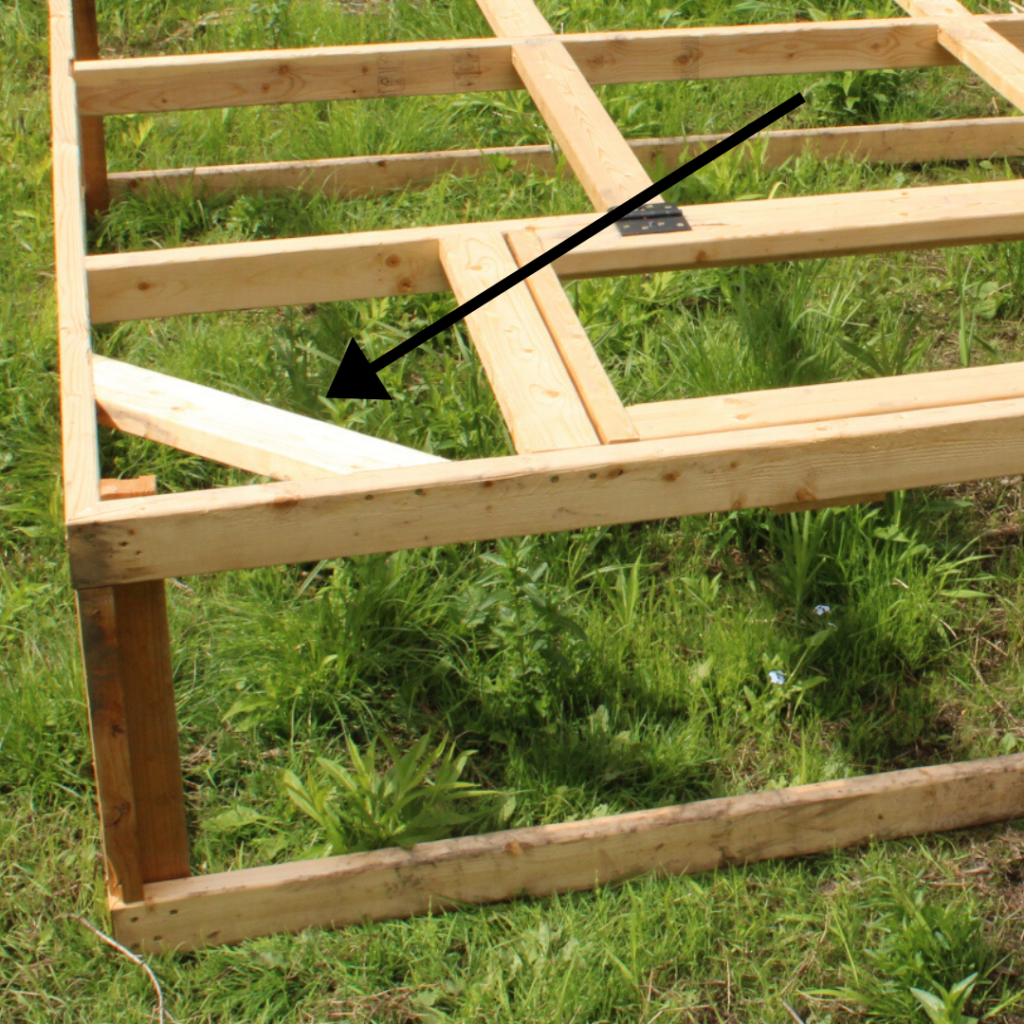
Put a 2 foot board in the center of each side just to give a bit more support.

Spaced evenly across the top of the frame, add two boards for the roof support.
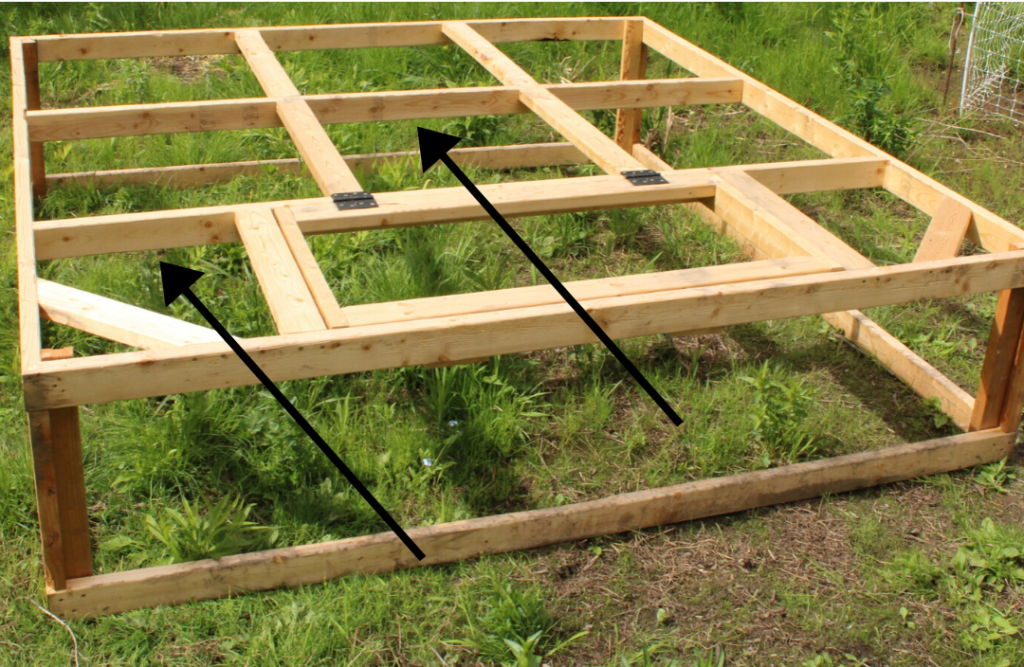
We then added four boards connecting the two inner roof boards and one of the top frame boards. This adds a bit more support for the roof so it doesn’t sag.
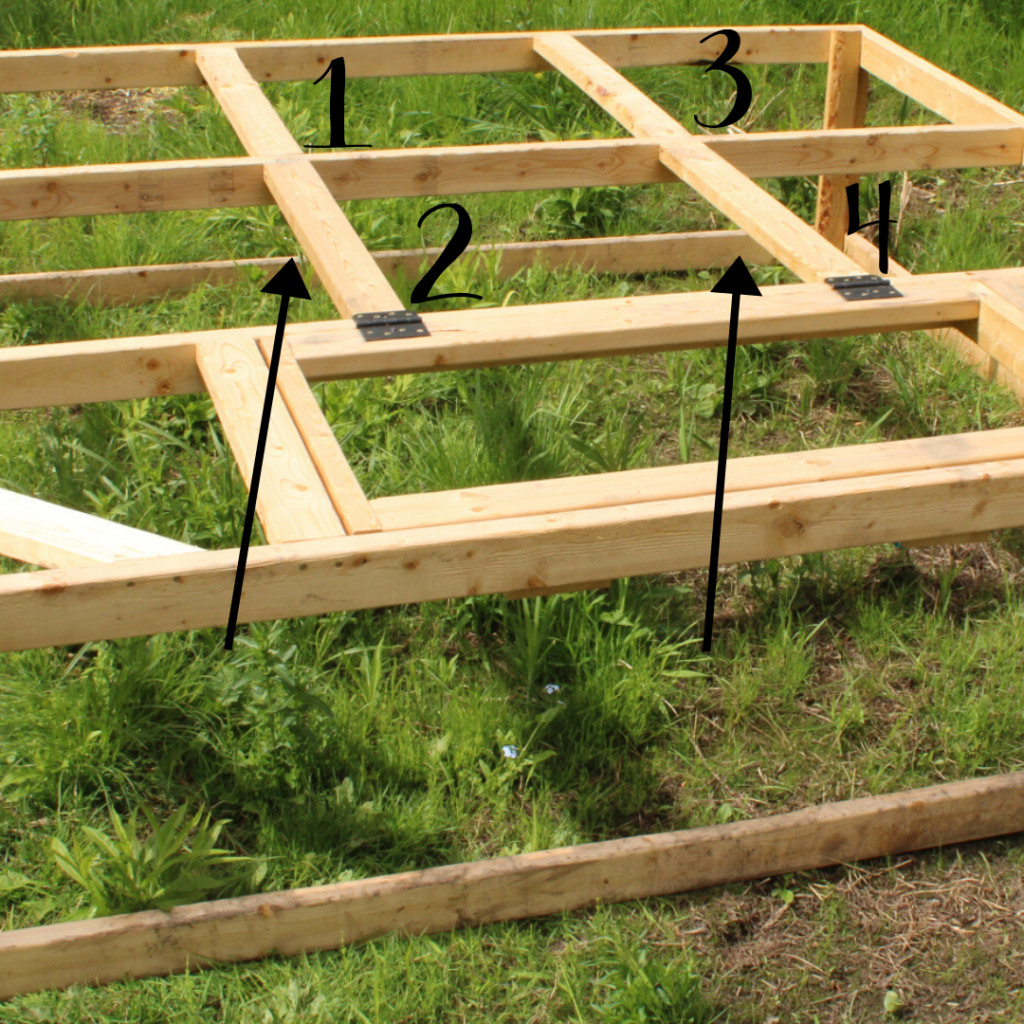
Next the door was framed out. Just like when we added the extra support boards in the previous step we did this to frame out the door. These were just placed a bit further apart then the other boards.
Reinforcing the Frame
At this point you can make the door that fits into the frame and attach it with the hinges. We also added a couple small pieces of the 2×4 boards for the door to rest on when closed.
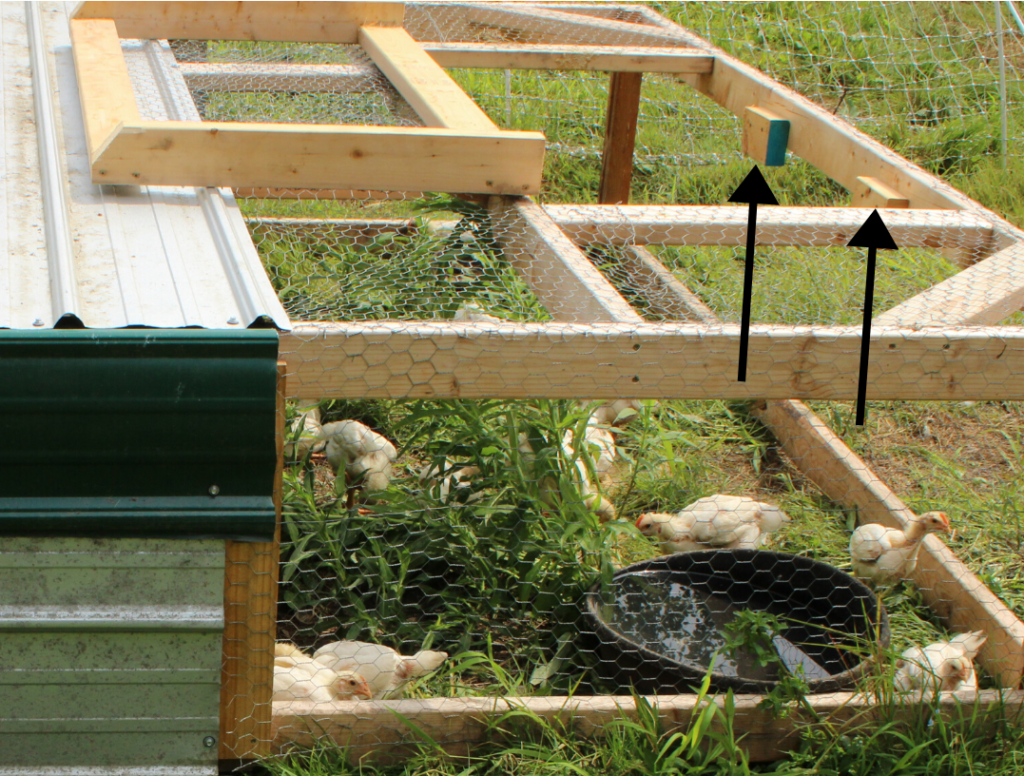
Add your metal roofing to the top back side and sides of your chicken tractor with the metal roofing screws. We used tin snips to cut the metal to size, you can also use a cut off wheel with an angle grinder.
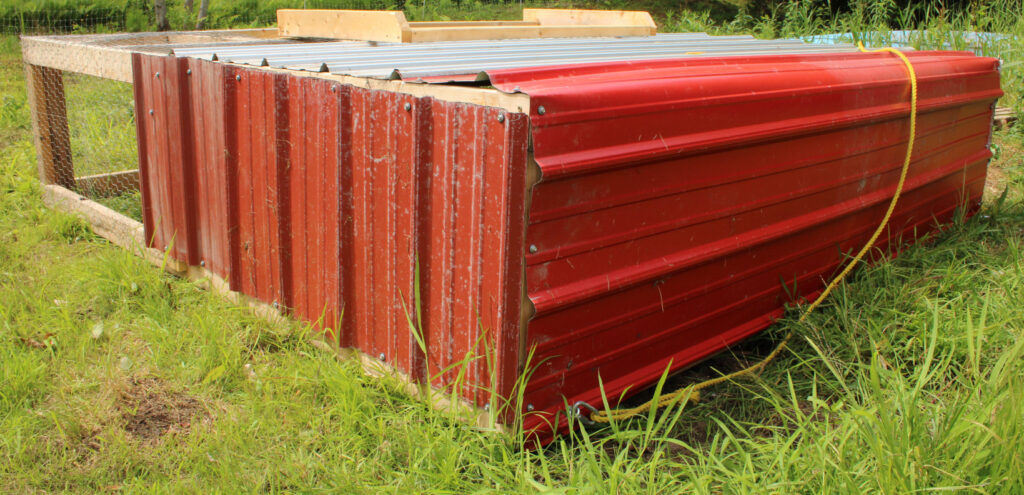
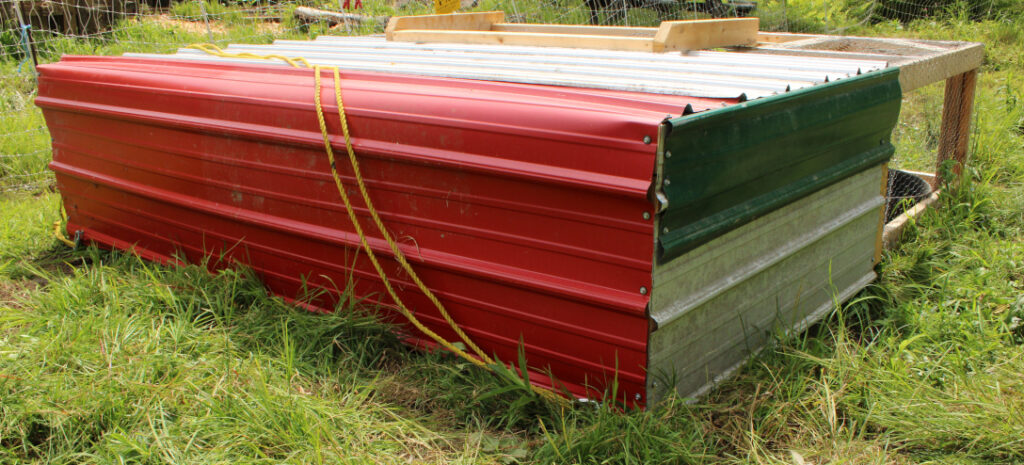
Cover your sides and remaining roof in chicken fencing and staple it in place very well. This part I would not be stingy on since this is what keeps predators out and the baby chicks in.
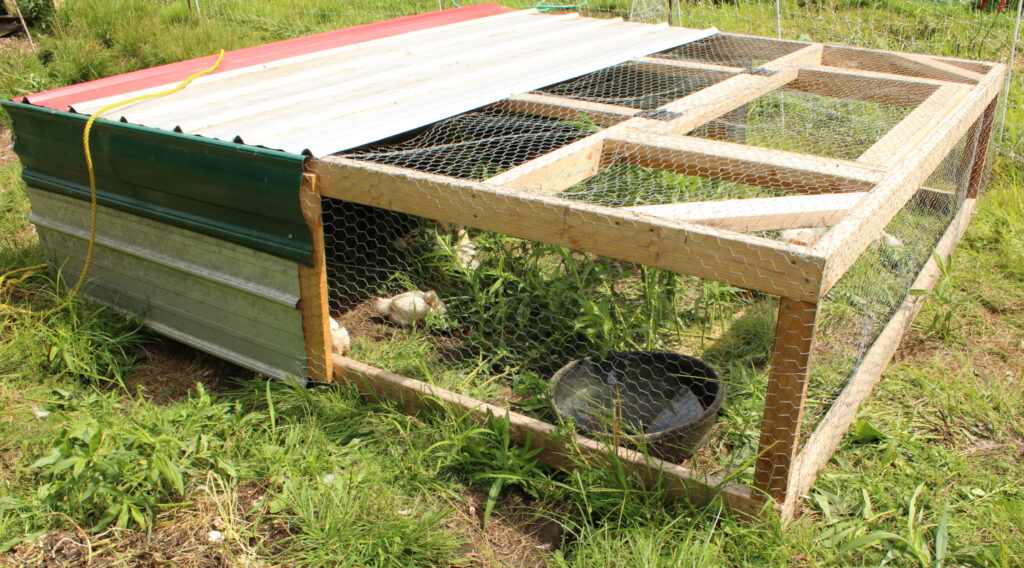
Don’t forget your handle on the top side of the door.
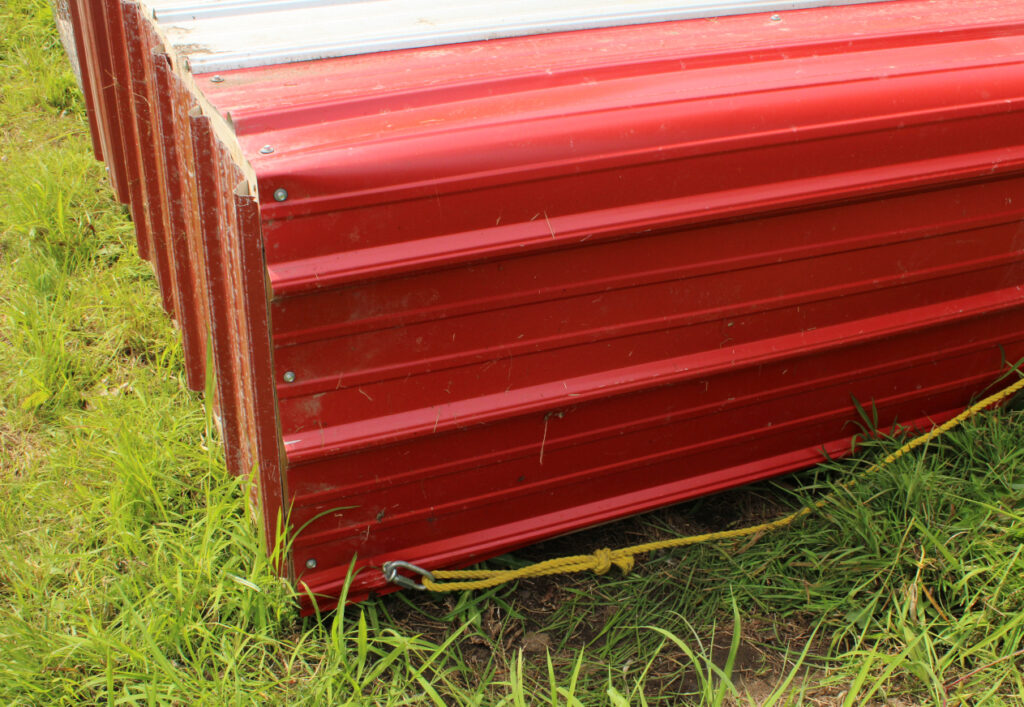
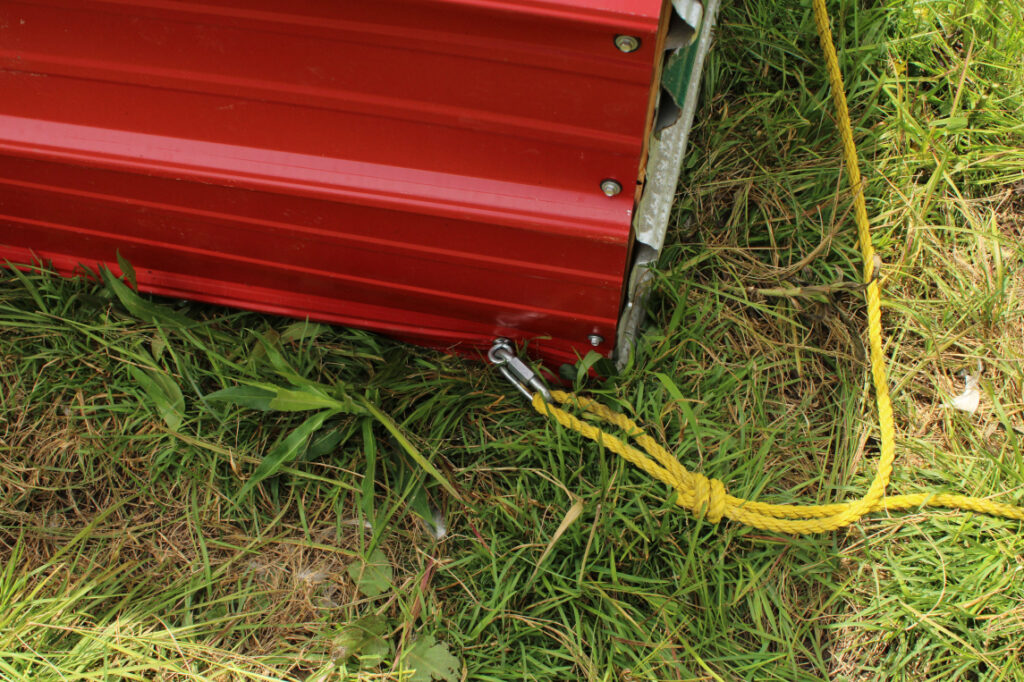
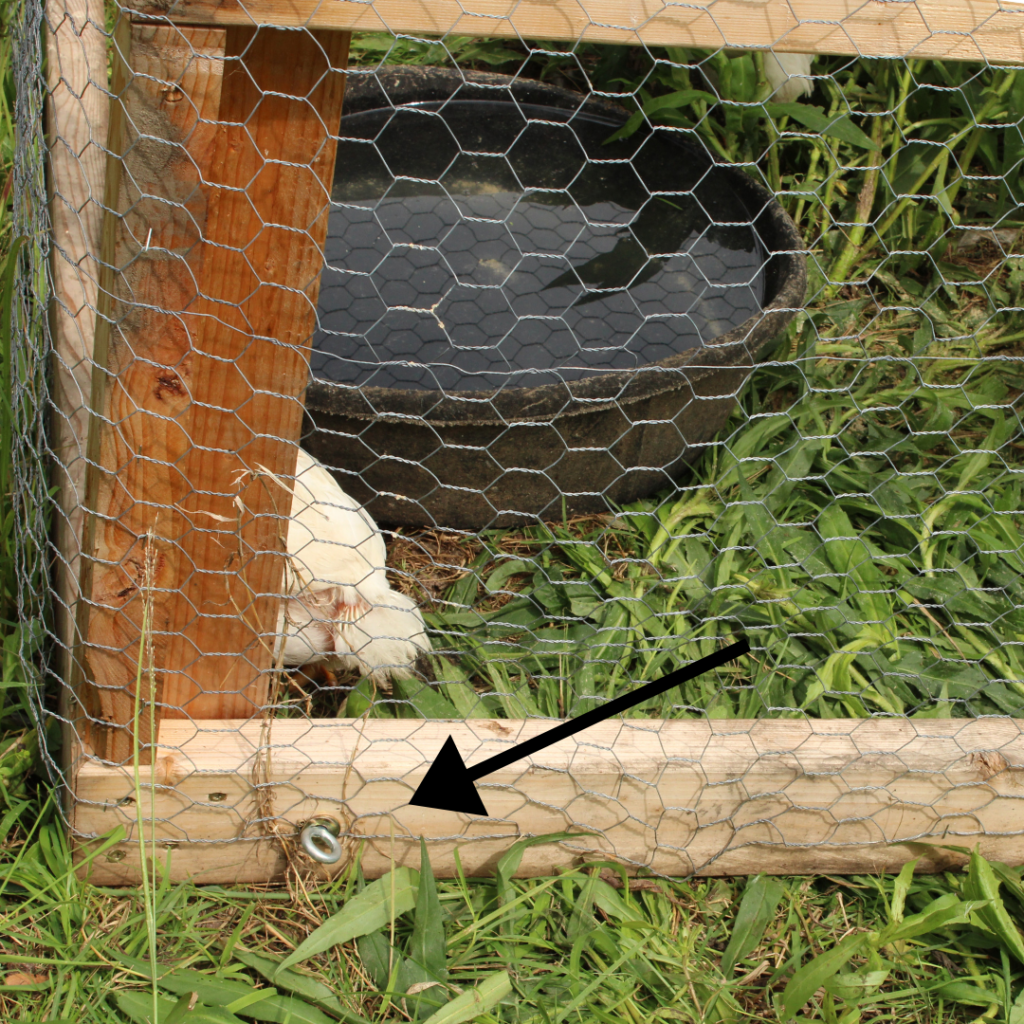
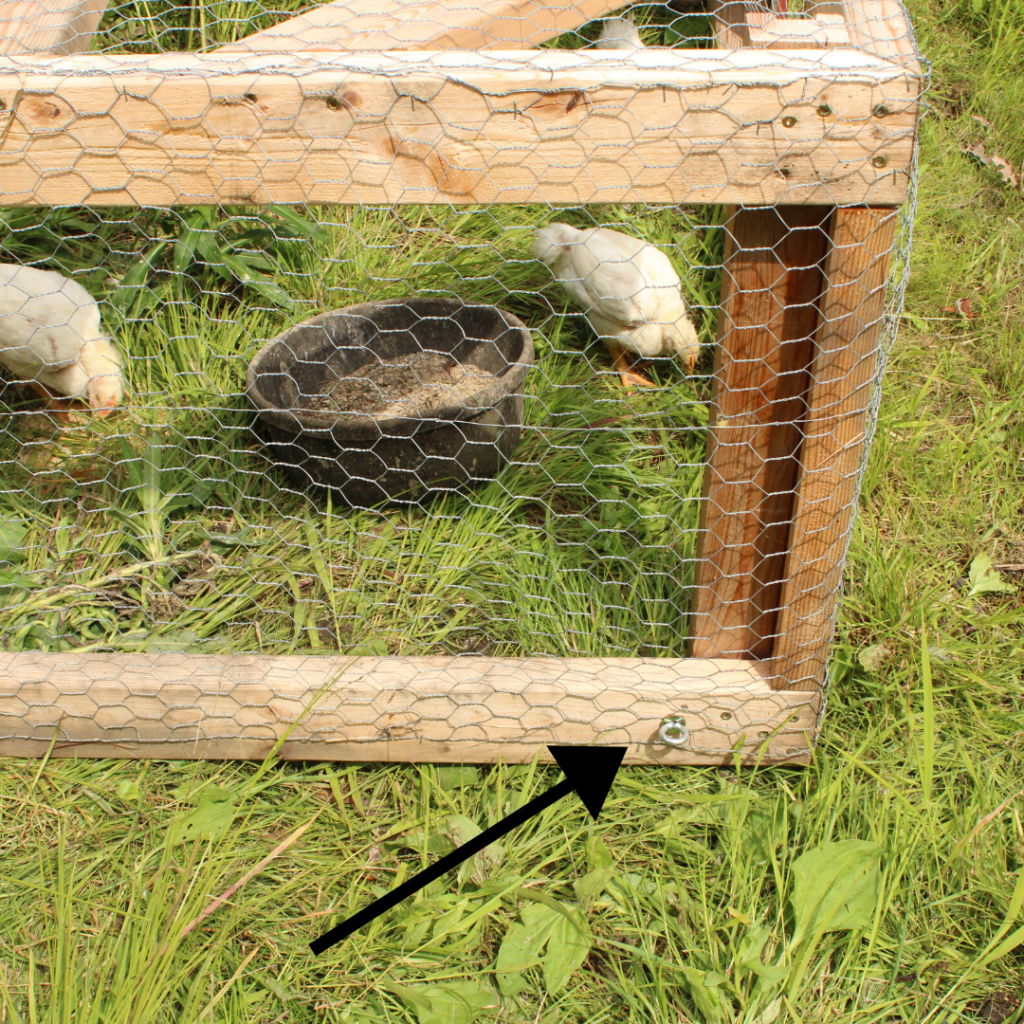
The eye hooks were then added on each corner so that we could attach the carabiners, which had the rope tied to them. So when you needed to pull the tractor in a certain direction you can just unhook the carabiner and move it to the appropriate eye hook.
Find more DIY Homestead Projects
Show your support and appreciation. If you did this project and found it helpful, give it a 5 star review and leave a comment. Follow me on Instagram @naturalliving.homestead then tag me in a photo of your project! Thank you!
DIY Chicken Tractor
Materials
- 10 - 8 foot long 2"x4" boards
- 3 inch screws
- Aluminum or other metal roofing
- Metal roofing screws with a rubber washer
- Chicken fencing with 1 inch holes and 2 feet tall
- Handles
- Eye Hooks
- Heavy duty carabiners
- 12 foot long rope
Tools
- Screw Gun
- Tin Snips or cut off wheel with an angle grinder
- Heavy Duty Stapler and Staples
- Miter Saw
Instructions
MAKING THE FRAME
- Make your 8 foot by 8 foot frame out of the 2x4 boards.
- Attach your 2 foot vertical corner support boards on all four corners then build your second 8 foot by 8 foot frame at the top of the corner support boards.
- Add your horizontal corner support boards to each top corner to keep the chicken tractor square.
- Put a 2 foot board in the center of each side just to give a bit more support.
- Spaced evenly across the top of the frame, add two boards for the roof support.
- We then added four boards connecting the two inner roof boards and one of the top frame boards. This adds a bit more support for the roof so it doesn't sag.
- Next the door was framed out. Just like when we added the extra support boards in the previous step we did this to frame out the door. These were just placed a bit further apart then the other boards.
REINFORCING THE FRAME
- At this point you can make the door that fits into the frame and attach it with the hinges. We also added a couple small pieces of the 2x4 boards for the door to rest on when closed.
- Add your metal roofing to the top back side and sides of your chicken tractor with the metal roofing screws. We used tin snips to cut the metal to size, you can also use a cut off wheel with an angle grinder.
- Cover your sides and remaining roof in chicken fencing and staple it in place very well. This part I would not be stingy on since this is what keeps predators out and the baby chicks in.
- Don't forget your handle on the top side of the door.
- The Eye Hooks were then added on each corner so that we could attach the carabiners, which had the rope tied to them. So when you needed to pull the tractor in a certain direction you can just unhook the carabiner to the appropriate eye hook.
Pin It for Later!

I like this design! It’s different than the other chicken tractors I’ve seen. Thank you for the easy to follow tutorial!
My pleasure 😊
Hello. How many meat birds do you put into this size of tractor?
Up to 40 chickens
What breed meat chickens are you raising?
Cornish Cross
Thank you so much for sharing these plans. Really helps us out a lot! One question…. Would the hard plastic, ribbed, semi transparent sheets work instead of aluminum?
Depends on how transparent they are. They still need shade, so if its more white then clear it may be fine as long as it creates enough shade for them.
Such a great design !!! Very easy to follow . My husband and I are very excited to make this ! I I do have a couple questions . I’m new to the meat chicken world lol. The area under the roof , is it closed in ? Is that where they go at night ? Or Do I have to have a separate area for them to be protected at night ? Thank you !
It’s all one open area. The part with the roof is just that, for protection from the elements. I have run my meat birds and pullets in this. They typically all huddle together in a corner for the night. I haven’t had anything get in there to them, just use strong staples to hold the chicken fencing on.
What about predators at night digging under the tractor? Cyndie
I have not had this issue with any of my tractors. Though some people will have guard dogs or geese to scare off any predators. At one point this past summer I added a guineafowl to my flock of young pullets in my chicken tractor. If you haven’t heard their voice before, guineafowl are very loud. So if something did go near them I’d hear their call.