Learn how to butcher a chicken so you can have food for you and your family this year. Just some basic tools that you can implement for your own backyard processing day.
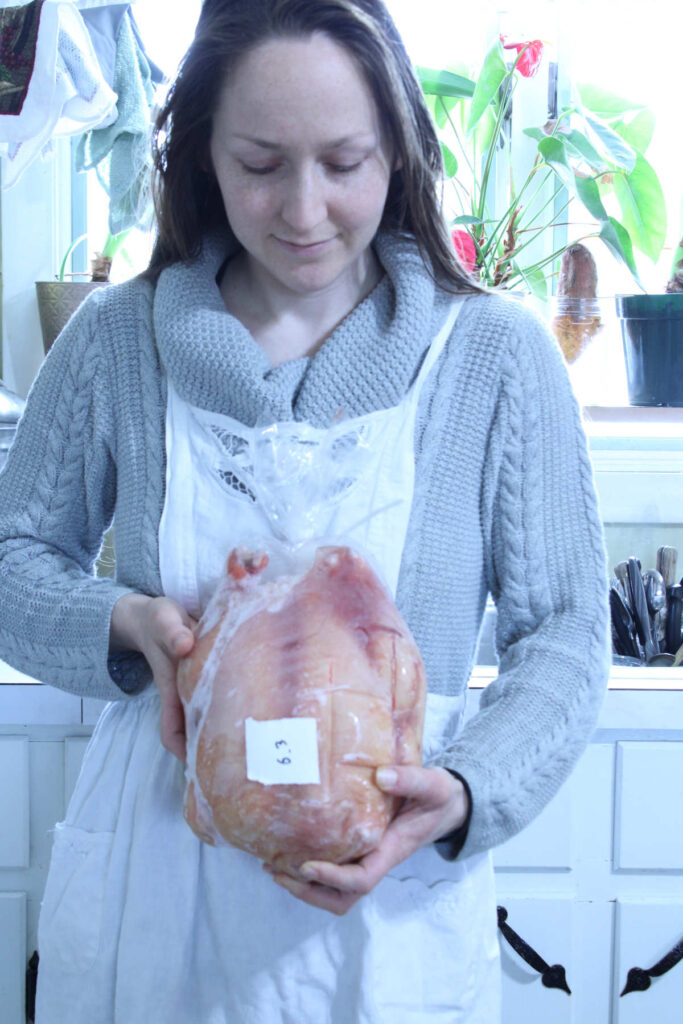
Originally posted 4/2/23. Post updated 4/20/24
This post contains affiliate links, which means I make a small commission at no extra cost to you. See my full disclosure here.
Learning how to butcher a chicken is a skill that you should have if you want to be self-sustainable if you plan to eat chicken. I will show you the entire process of how we processed our meat chickens our first year ever raising them for meat. Processing chickens is not for the faint of heart. We do not look forward to the day that we process our chickens because we are taking an animals life. Instead we look at it as they are providing us with food that God intended for us and we are so ever grateful for them.
WARNING: PHOTOS OF HOW TO BUTCHER A CHICKEN FOLLOW. THERE ARE GRAPHIC PHOTOS. PROCEED WITH CAUTION.
Our family has chosen to eat meat for many reasons. So if we are going to eat meat we should be willing to take part in the process of acquiring our food. If you do not eat meat, we respect that and won’t be hurt if you don’t want to know about this topic. If you would prefer, here is a delicious recipe on how to make Sourdough Banana Bread.
I’M A SEASONED CRAZY CHICKEN LADY AND THIS IS THE FIRST TIME I’VE BUTCHERED A CHICKEN…
I have raised chickens for most of my life. Albeit they were for eggs only, I had never needed to process them myself. If we had an over abundance of roosters we took them to a meat processor locally and they would be stew birds for the freezer.
This time around, my husband and I decided we wanted to raise chickens that were for meat and we wanted to process them ourselves. We’ll save some money and we can be more self reliant when it came to storing our own food. We’d know they were raised right in a clean and healthy environment. Then by processing them on site there was no stress of loading them in the vehicle and moving them to a meat processor. Less stress = better tasting meat, or so I’ve heard.
After many YouTube videos to learn how to process a chicken, the time came to do the deed.
HOW TO BUTCHER A CHICKEN – THINGS DON’T ALWAYS GO AS PLANNED
I had set everything up the day before and we were good to go. We ended up having some hiccups along the way as the day came around.
It was raining off and on, heavy downpours, so an awning was required. We then didn’t get to start until 12 pm, which is too late since we hadn’t done this before. Also, the kill cones we had didn’t work out, one was too big and the other was too small. The first chicken that we processed took us a while. We had to hang the chicken by the feet upside down. The scalding water got too hot and started to cook the chicken.
The plucker worked reasonably well but really isn’t meant for processing more then a few birds. Then learning how to actually clean and gut the chicken takes a little bit to figure out.
We eventually got it all done around 8 o’clock in the evening and cleaned up. It was an extremely long day. Thankfully with the help from family and friends we were able to get it all done that day.
IS IT EASY KILLING SOMETHING YOU’VE RAISED?
No, it is not easy to kill something that you have raised. We do not look forward to the day that they need to be put into the freezer. Being a meat eater, something has to die in order for me and my family to live. This is why we choose to raise them ourselves. To make sure they have a good life. They can be put to rest as peacefully and with the least amount of stress as possible. If you’ve seen the movie Food Inc., it may make you want to avoid factory farmed meat from the store.
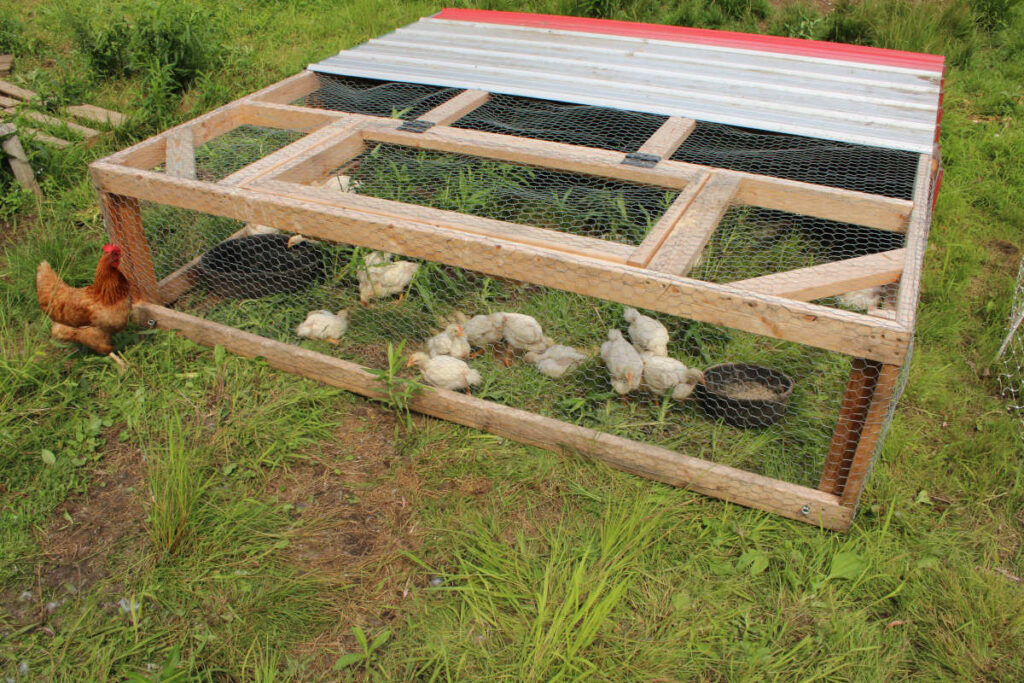
My animals are in the sun or shade as they please, breathing fresh air on lush green grass. Then moved daily to a nice new patch of grass for them to eat. Sounds like a happy chicken to me.
When it comes to kids on the homestead, we don’t hide this from them. My kids know where their food comes from. In order for them to eat those yummy chicken wings, this chicken dies so they can have food for dinner.
They know the chicken on their plate didn’t come from a package that was on the grocery store shelf, never knowing anything that happened before that. There is no disconnection from their food and how it got there and what happened to it over the course of it’s life. They help scoop the food every day for them to eat or collect worms for them to eat.
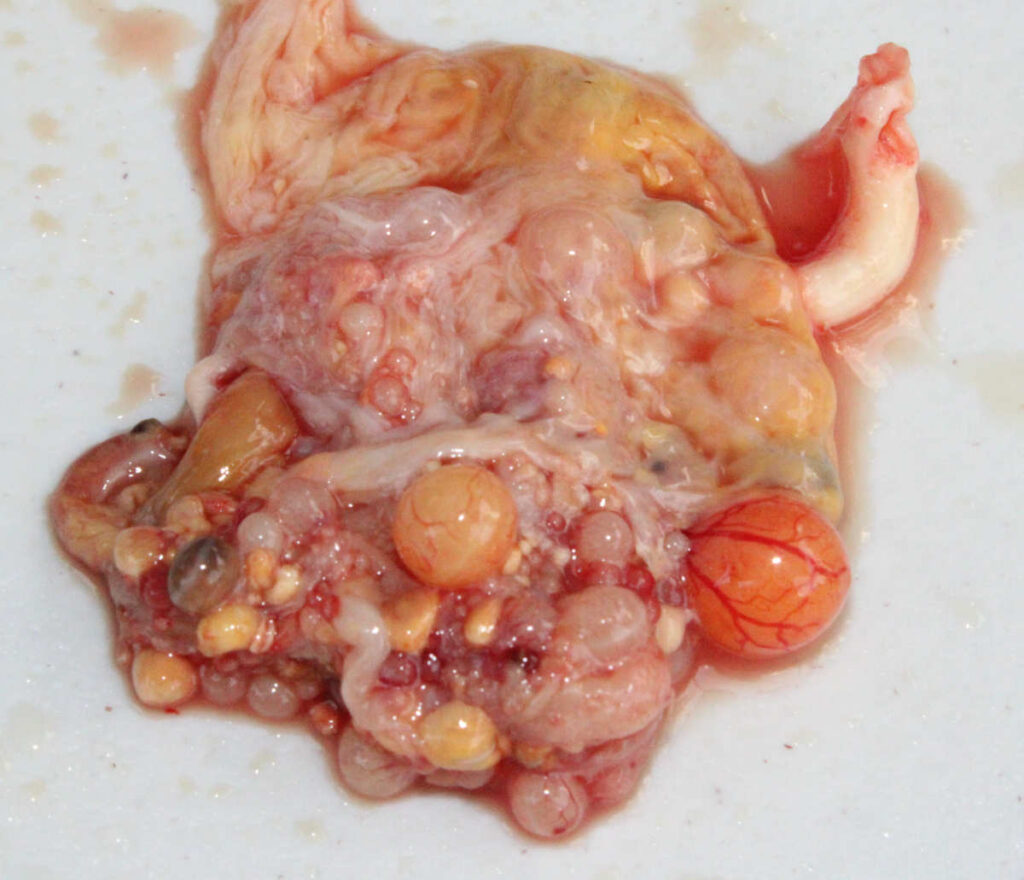
Also, it’s a great way for them to learn the anatomy of a chicken. They may see the immature egg yolks if it was an egg layer chicken.
HOW TO BUTCHER A CHICKEN – EQUIPMENT NEEDED
There are a couple different ways you can go about equipment for chicken processing. We kept it minimal with only simple and inexpensive items. If your only doing a small batch of about 10 chickens or less this list would work great. If your planning on processing more then that, you may want to upgrade to more powerful expensive equipment.
Equipment
- A killing cone – Weigh your chickens before hand and look into the suggested weight for the cone size.
- A set of sharp knives. Use what you have in the kitchen or purchase knew. Either way, make sure they are very sharp. I’ve heard the phrase a few times, “A sharp knife is a humane knife”. If you have a dull knife you can’t properly dispatch your chicken, they suffer because it takes longer.
- Poultry Scalder – you can use a large 30 quart stock pot (turkey fryer) or a larger 14 – 30 gallon scalding tank. We used a turkey fryer to scald our 25 meat birds.
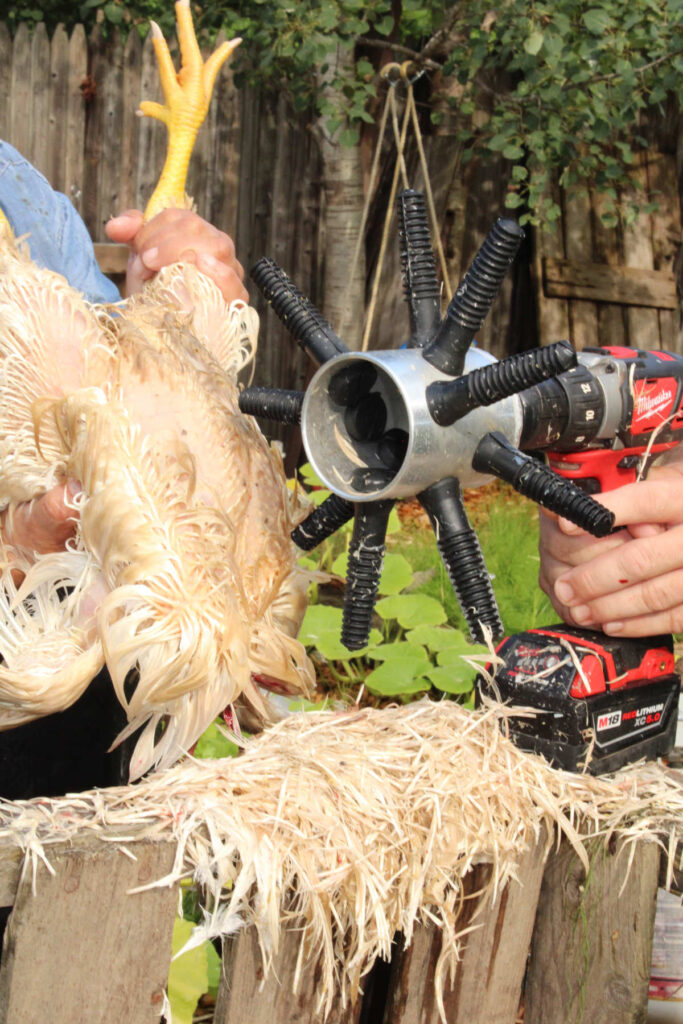
- Plucker – if you have about 10 birds or less you could can pluck by hand or use a plucker attachment for a electric screw gun (photo a few pictures below of the one we used). If you have more than 10 you may want a large industrial style automatic plucker.
- Poultry Shears – These are for cutting off the neck. Link at the end of this post for the ones we now use.
- Waterproof aprons
- Heatproof Gloves – very helpful when scalding, especially if your wanting to save the feet/legs.
- Work surface – you can use stainless steel tables or even a plastic folding table.
- Ice Chest or Coolers filled with ice – or any food grade container that can hold them until your ready to bag them.
- Poultry shrink bags – these help to prevent freezer burn and it gives it a more professional and neat look.
HOW TO BUTCHER A CHICKEN
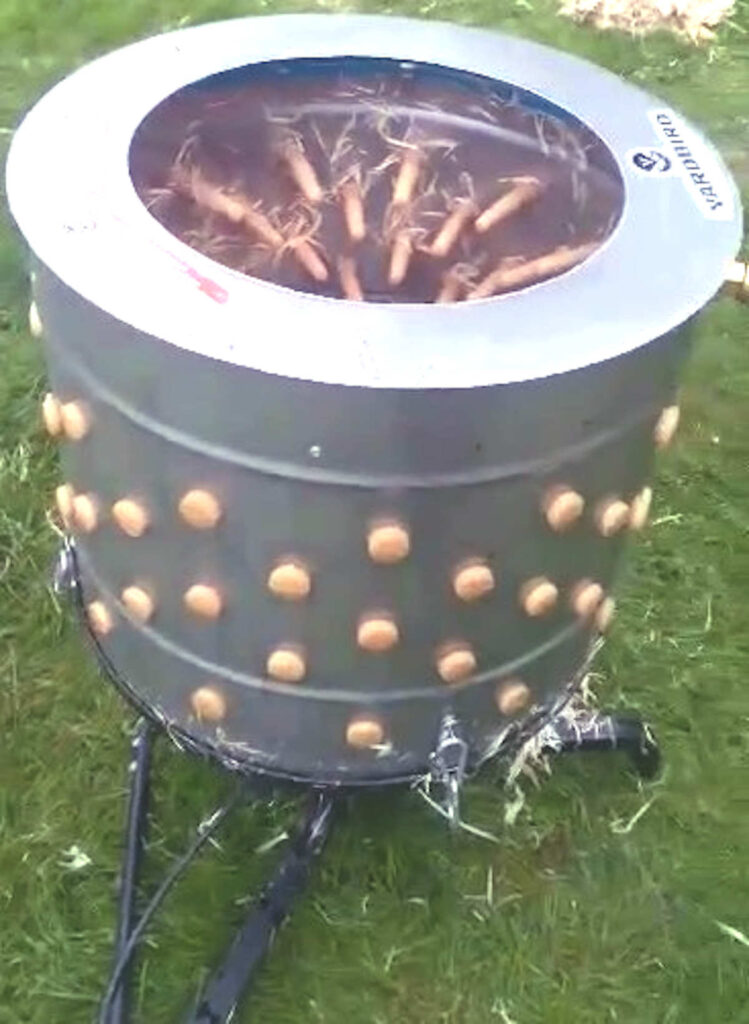
This is a big scale backyard chicken automatic plucker that you can use for processing larger quantities of chickens. Can easily fit a couple chickens at once or a small turkey.
1. SET UP YOUR PROCESSING AREA TO BUTCHER A CHICKEN
The day before you plan to process your chickens you will want to leave their water but remove their food. This will allow all the food in their crop, gizzard and intestines to empty out and make cleaning them easier and less messy. You will also want to have a way to move them closer to the processing area. I kept the live birds in their chicken tractor just moved it closer to where I would need them.
Set up the kill cones (with a large bucket under them with a few inches of water in each bucket). Set up the scalder, plucker, and any other necessary tools you may need. If your outside in the open you may want to set up some portable folding canopy’s. You may want one over the evisceration table since you’ll be there the longest.
It would be a good idea to have a hose at the evisceration table to help with any messes. Then another hose at the plucker if you have a large automatic plucker. Some people have outdoor kitchens set up to do a final cleaning before it goes into the ice bath. Outdoor kitchens are very convenient when it comes to this project.
The morning of processing day, at least an hour before you plan to start, start warming up the scalder. Get your temperature to 150 – 160 degrees Fahrenheit for optimal ease of removing the feathers but not cooking the bird. You will also want to add some fresh water to your coolers with ice to chill the birds once processed.
2. DISPATCH THE CHICKEN
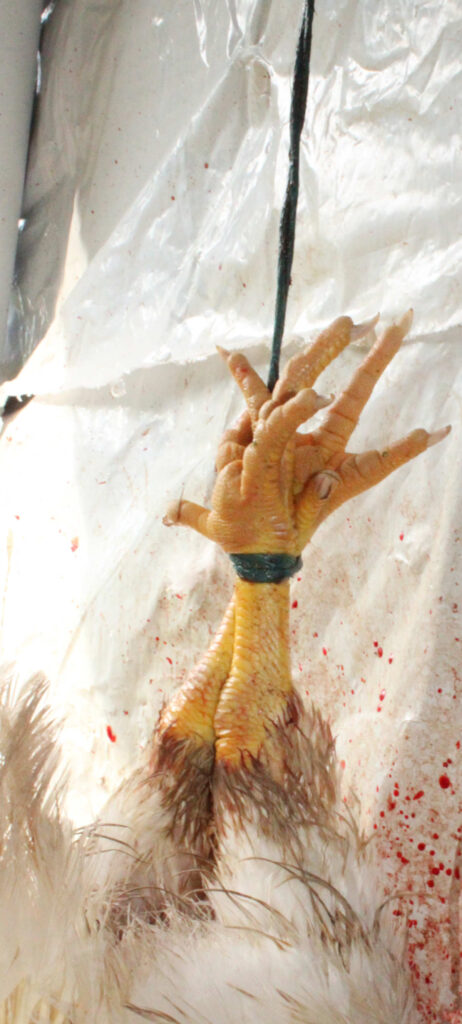
Once you are ready to begin, grab a live chicken and place it in the killing cone (in the photo above we hung it by the legs since the cone was too small). The first cut should be right below the jaw at the base of the head. Grab the head and with a (sharp!) knife, use firm, hard pressure, cut on either side of the jaw, cutting the jugular vein. Some people choose to remove the chicken’s head now. Wait until the bird stops moving and allowing all the blood to drain into the bucket. By processing the chickens this way, we feel that this is the most humane way to process them with the least amount of suffering.
3. SCALD THE CHICKEN
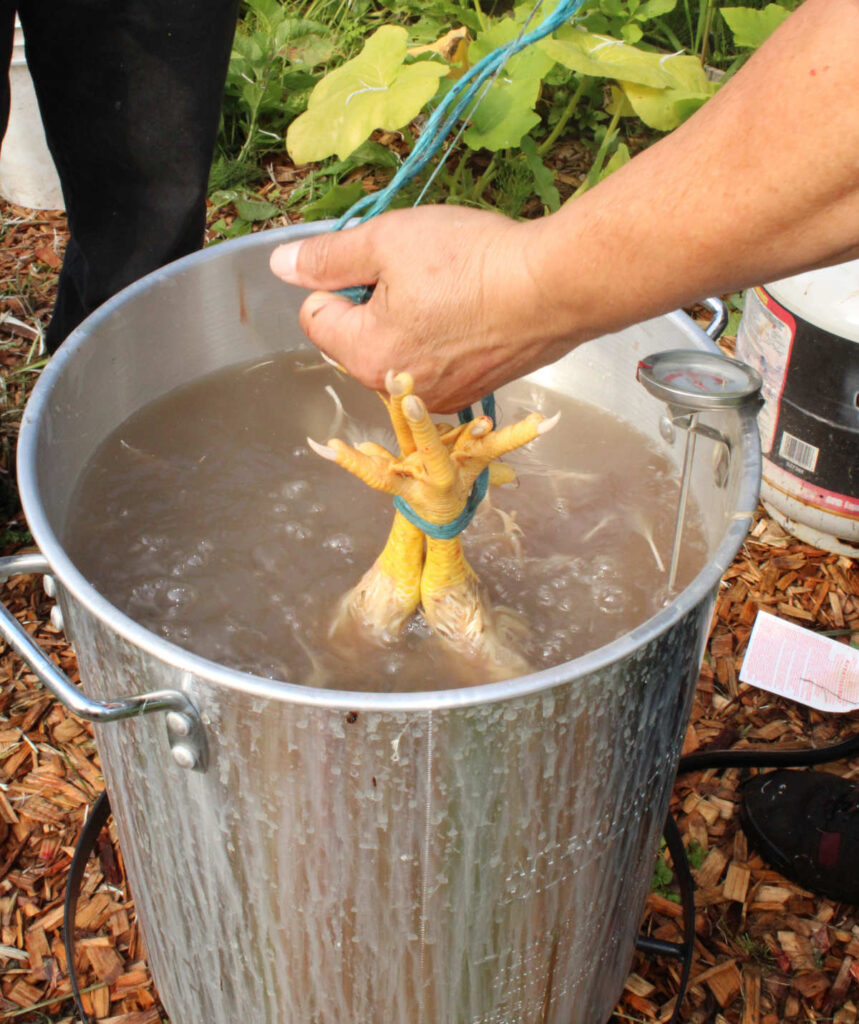
Once the blood has drained put the bird in the scalder and swish it around for about 3-4 minutes (careful not to let it touch the bottom if using a turkey fryer, it can start to cook the bird). You may want to have some rubber heat proof gloves to protect your fingers for scalding the feet.
Here’s a tip you if you don’t have heat resistant gloves. Take an old fashion potato masher and put the legs in between the grooves so you can submerge the feet.
You will know it has scalded long enough when the skin of the legs easily peel off or a large wing feather is easily pulled out.
4. PLUCK THE CHICKEN
Remove the bird from the scalder and remove the feathers with your preferred method. Either by hand or machine. We used a drill attachment this time. If you have an automatic plucker, you’ll need a hose to spray into the plucker to get the feathers off.
5. CLEAN THE CHICKEN
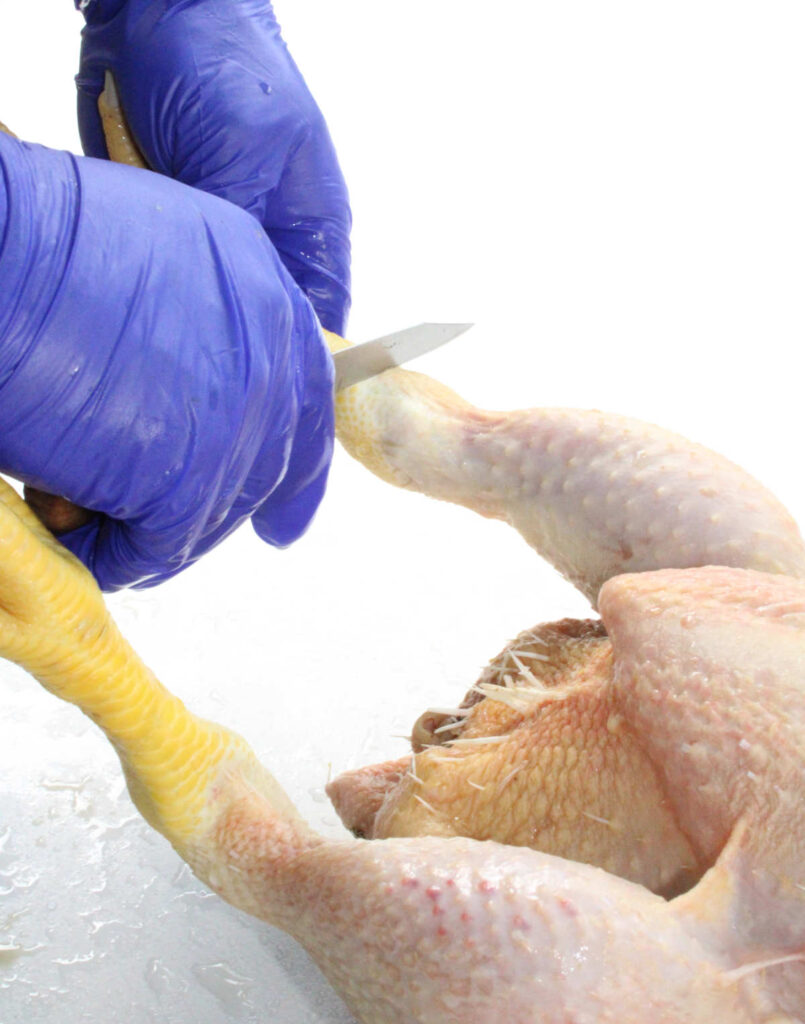
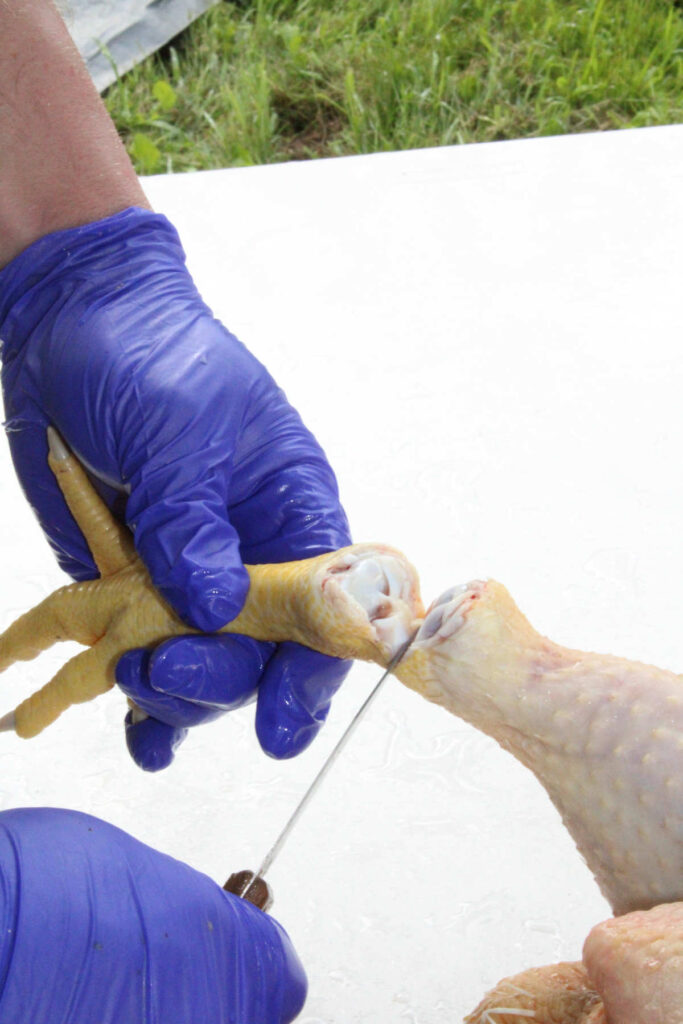
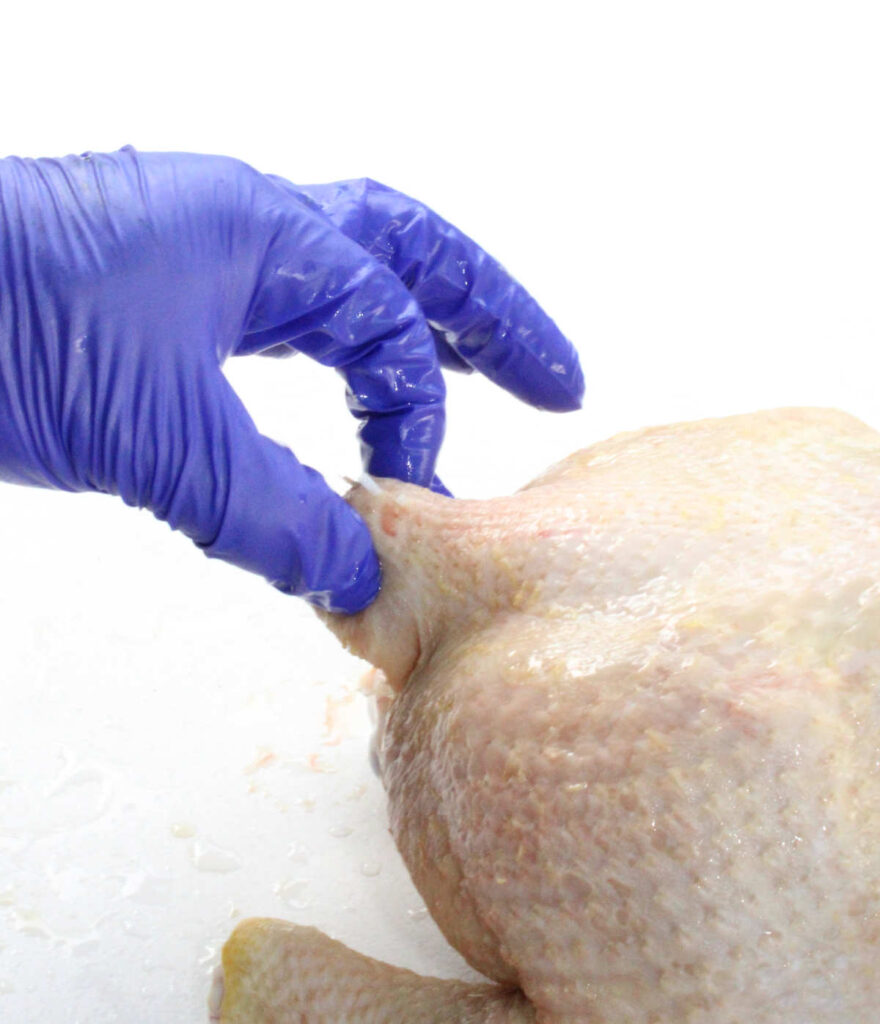
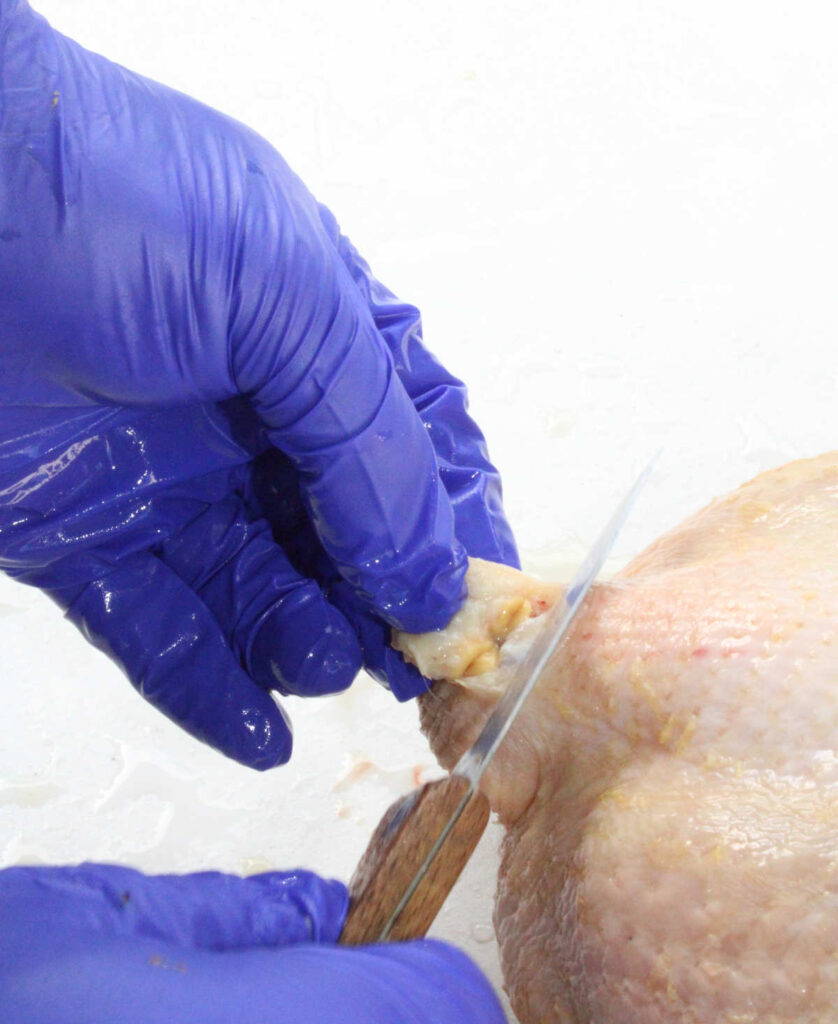
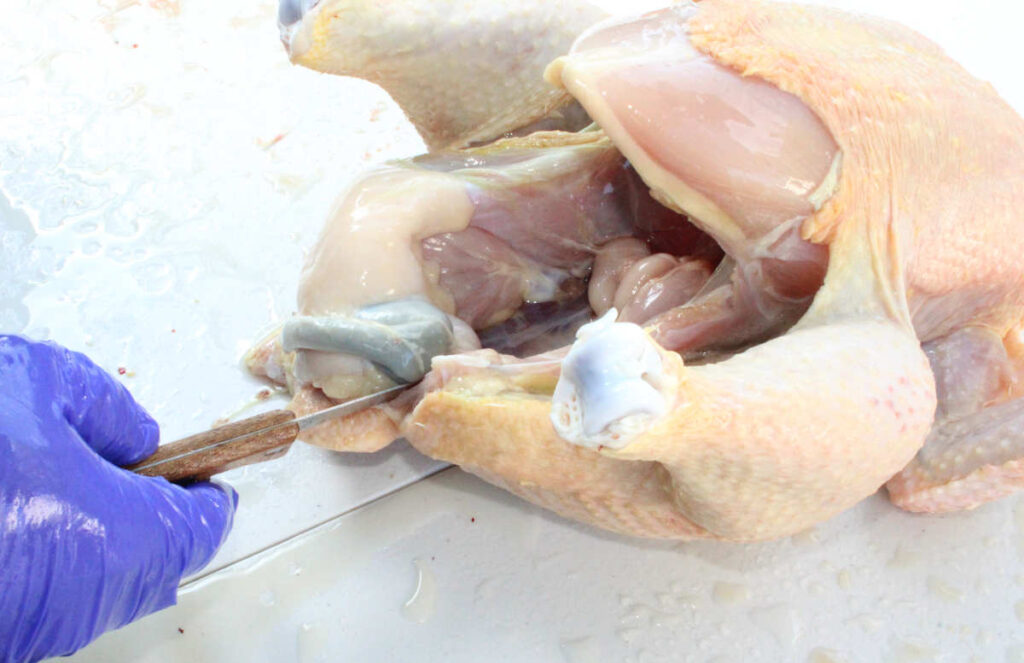
With your poultry shears, the head of the chicken off and cut the neck off at the base of the neck near the breast. Be sure to cut as close to the breast as you can, so bones don’t poke through the bag. Then remove the chicken’s legs as shown in the photos. You can set the feet aside to save them for making broths. Then remove the oil gland that’s at the base of the spine on the tail.
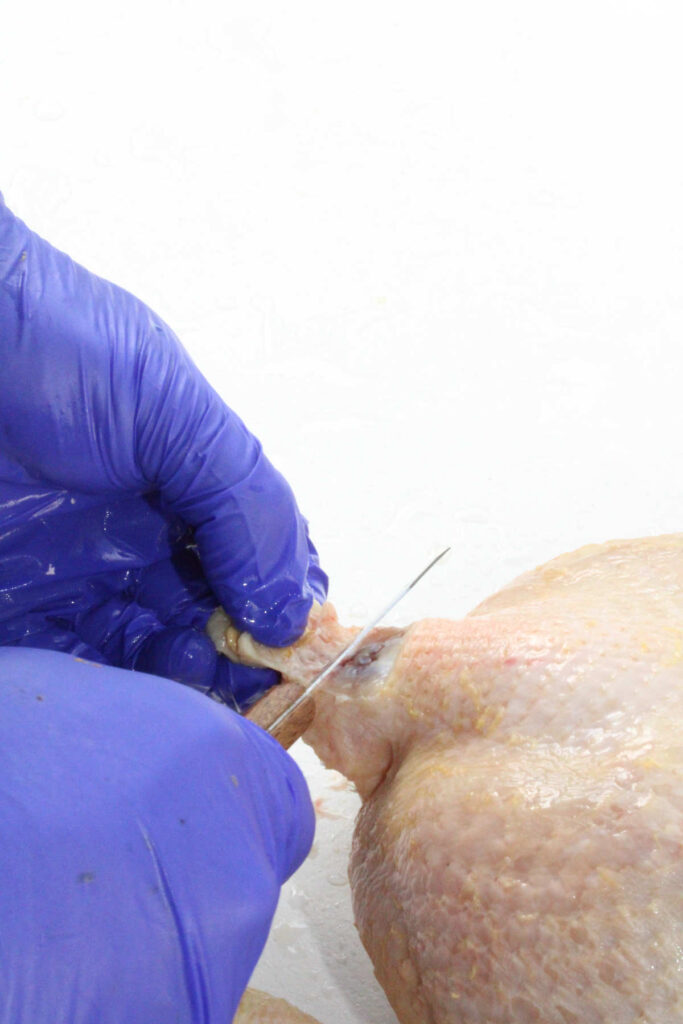
6. EVISCERATE THE CHICKEN
With the bird on its back, loosen the crop from the connective tissue under the skin of the breast near where the neck was, but don’t pull it out. It should be empty, flat and a pale color if they had their food removed the night before.
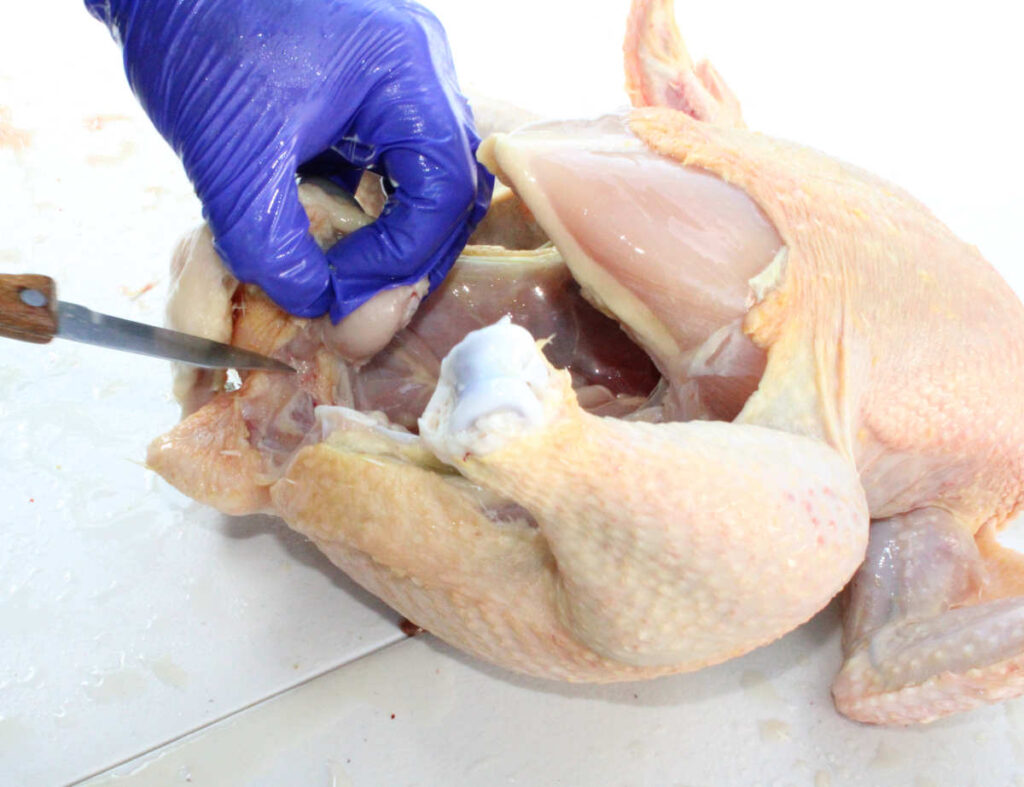
Turn the bird to the back end and pinch the skin below the breast bone along the abdomen and pull up. Cut a slit big enough to get your fingers through. Now with one hand near the vent and the other under the ribcage, pull apart to make a wider opening. Careful not to cut too deep, you don’t want to cut the intestines that are beneath it.
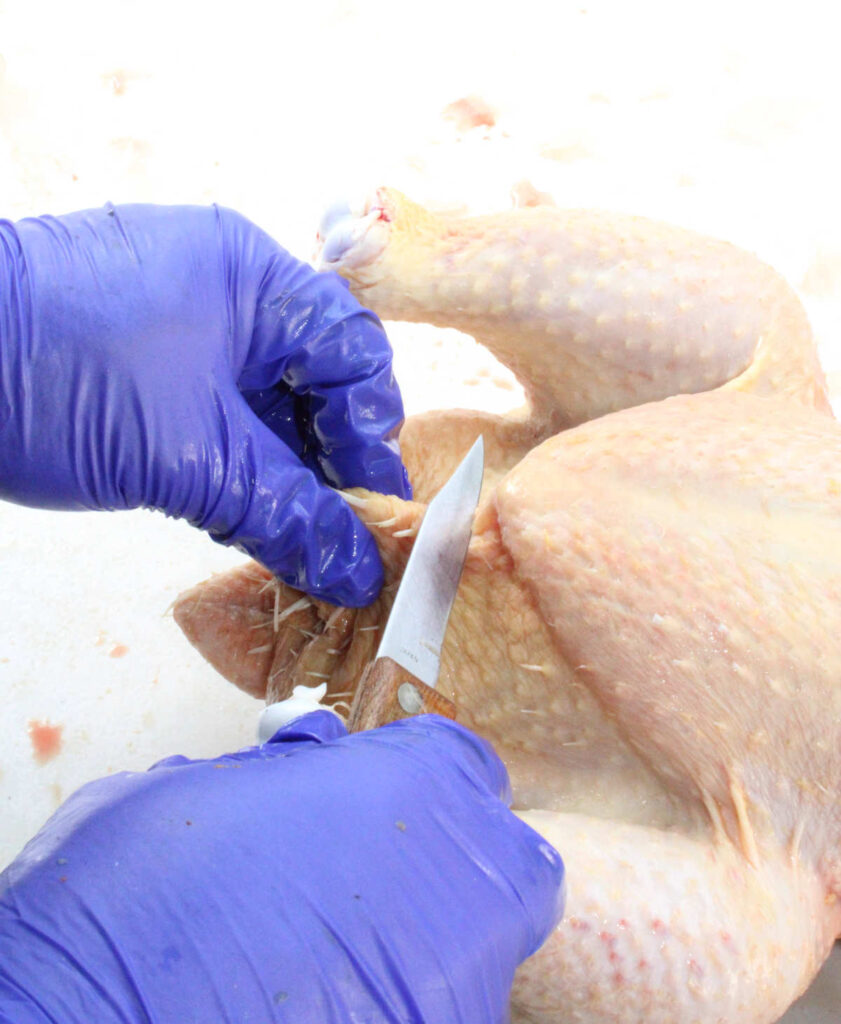
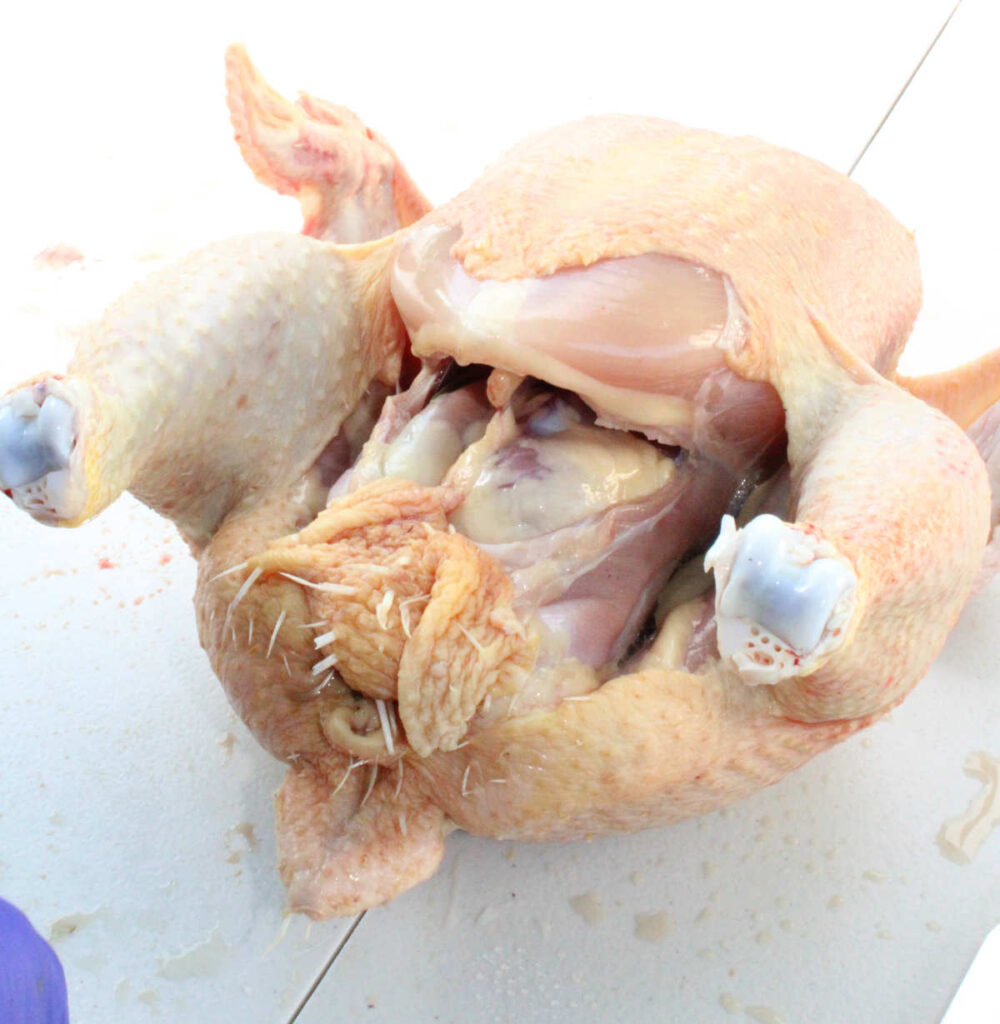
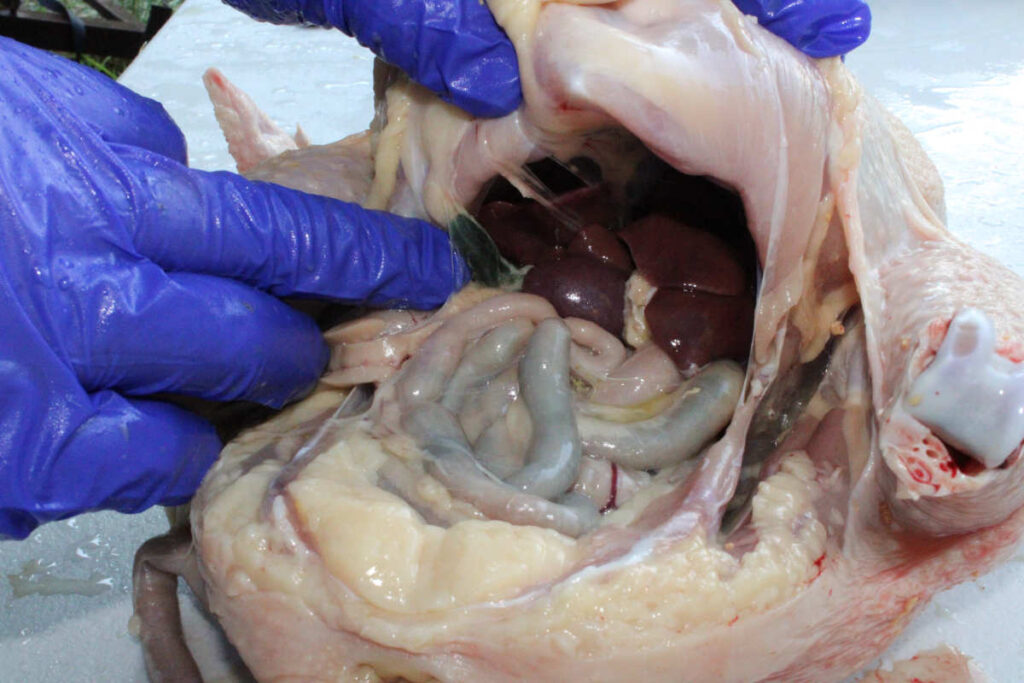
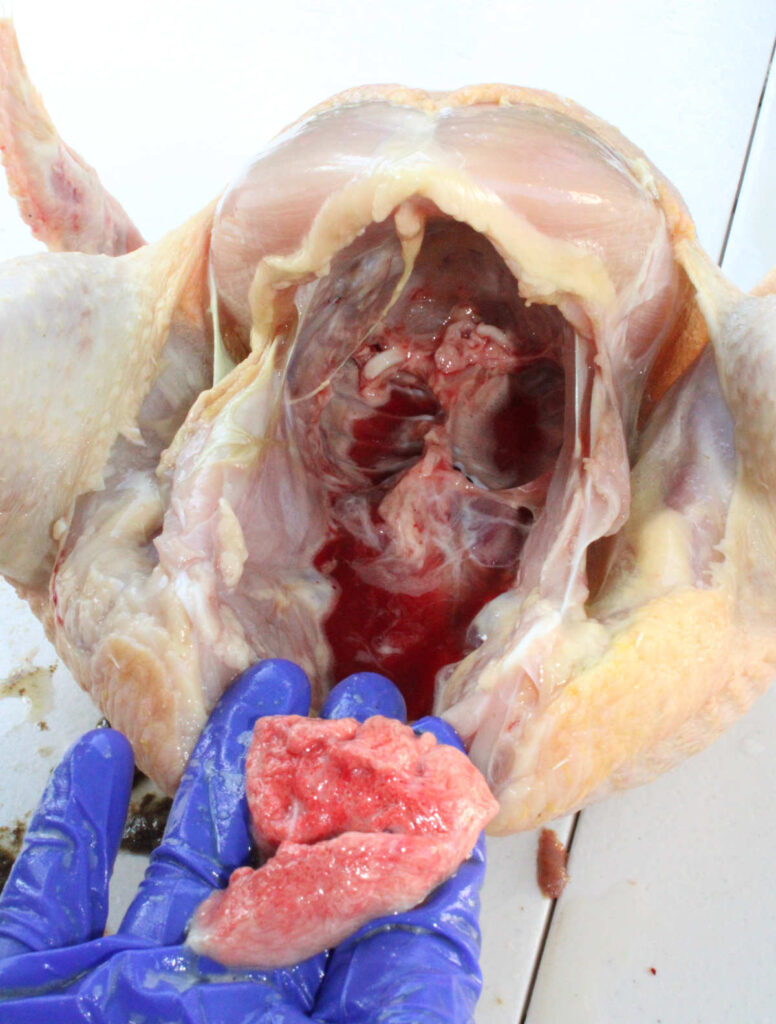
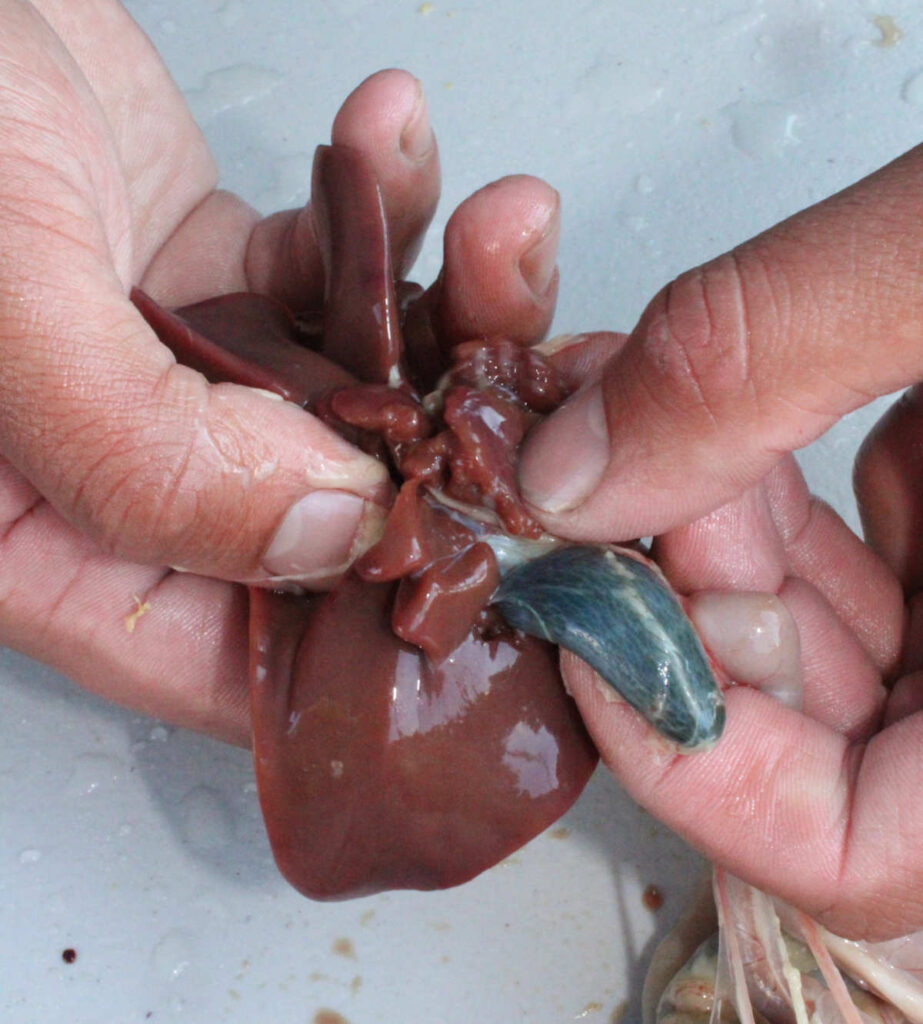
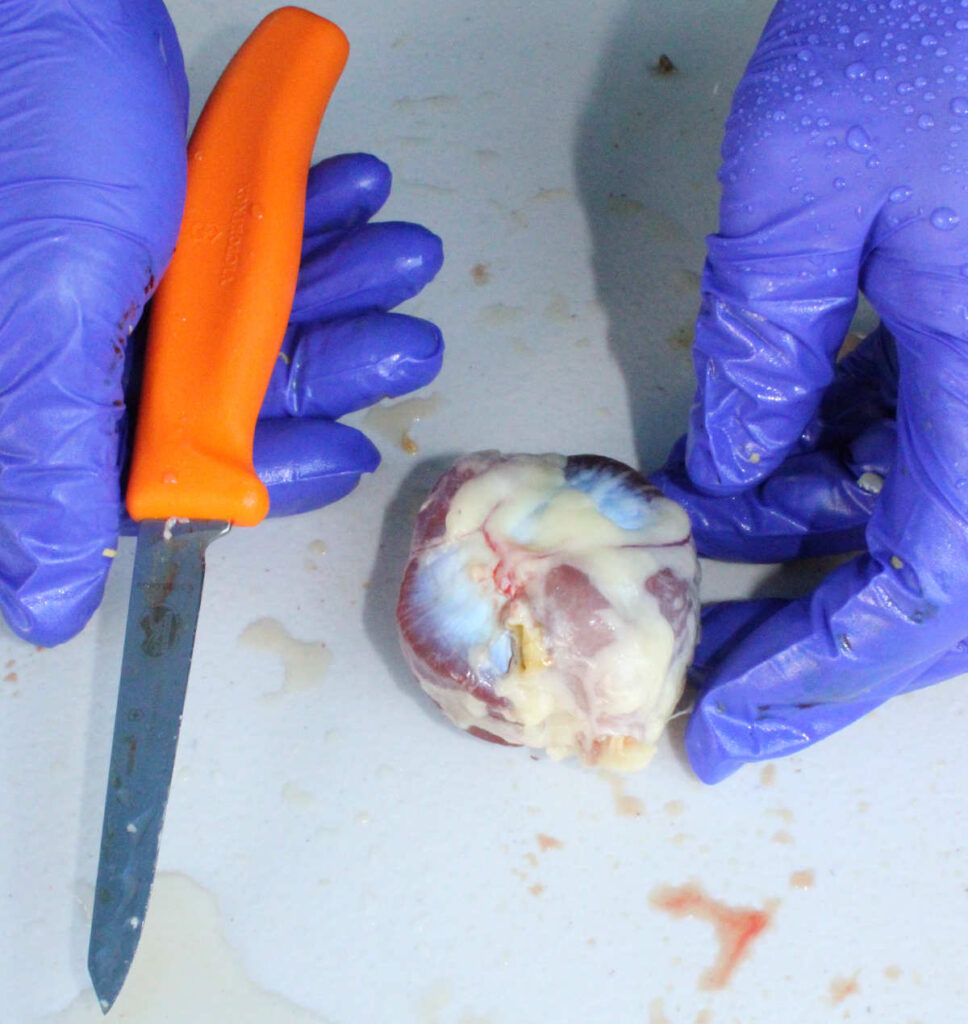
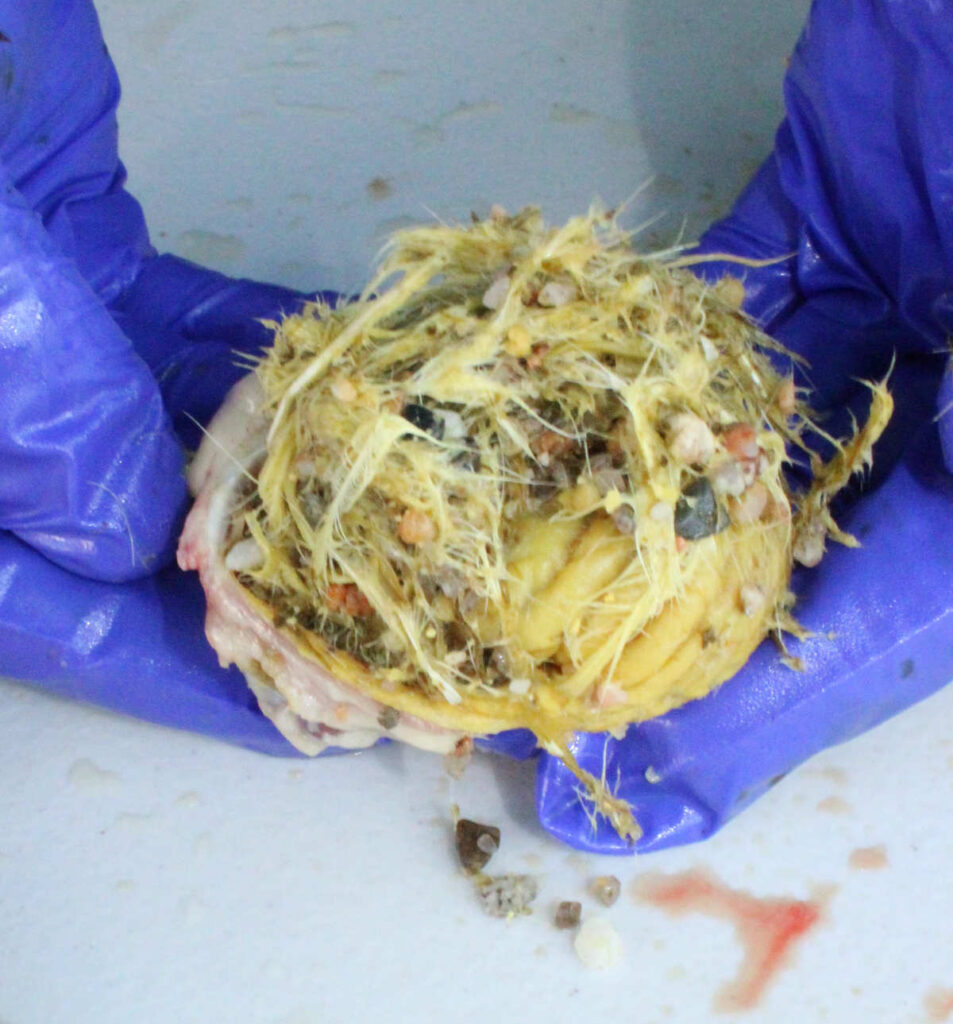
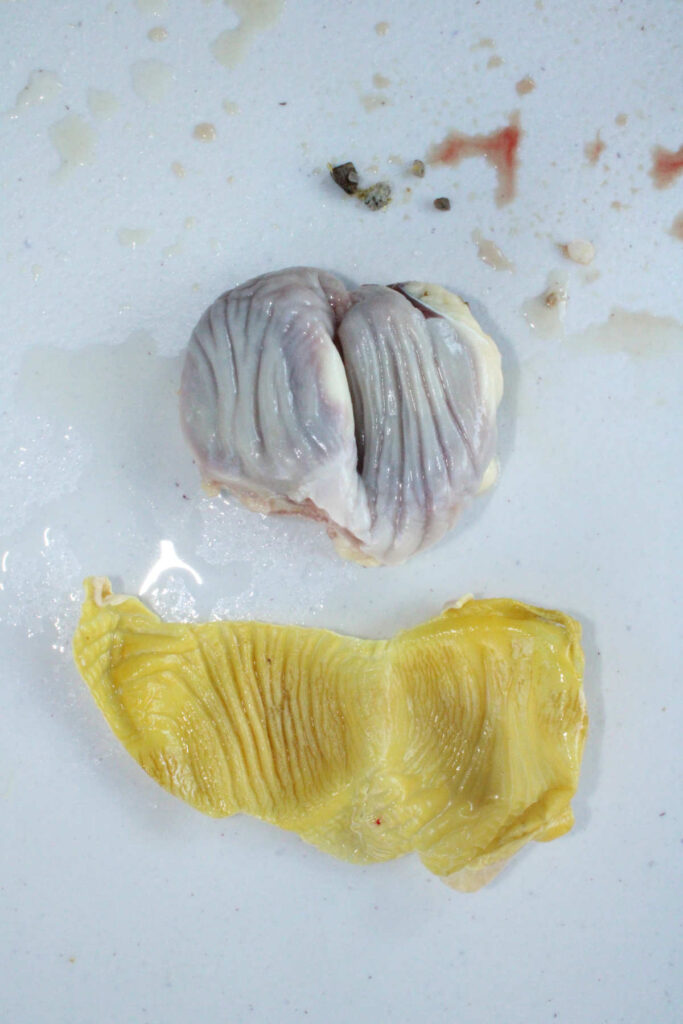
Put your hand inside the body cavity all the way to the top end and grab the windpipe and esophagus and pull everything out that you can. Be cautious when pulling the intestines out so they don’t get punctured. Once the bulk of the organs are out go back and get any other organs that may have been missed. The lungs tend to be squished against the ribs.
7. QUALITY CONTROL
At this point you can rinse off the bird inside and out, either at a sink or under a hose. I check the bird over to remove any feathers that may have been missed. Sometimes the oil gland or crop get forgotten.
8. CHILL THE CHICKENS
At this point you want to cool the chicken in cold water in a cooler before you bag it. It would be best to chill it overnight but I have never done that for lack of ice and fridge space. Usually after 6 hours in the ice water, I’ll air dry the finished chickens a bit and then bag them.
9. BAG THE CHICKENS
At this point, you’ve cleaned up your processing area and emptied your scalder water. Prepare it with clean water and bring it to temp for shrink wrapping the bagged chickens in the hot water. Follow the directions for the bags you get as far as temps and length of time in the water. Attach the zip tie then dry off the freshly packaged chicken. Put a label over the hole that you may have made in the bag for the bagging process. We like to weigh each chicken and put the weight and date processed on the label. They are now ready for the freezer.
HOW TO BUTCHER A CHICKEN – IMPROVEMENTS FOR NEXT TIME
After our first weekend, I started a list to reference back to so we can improve the next time we needed to butcher a chicken. Here are the things I added to that list.
- Start early – I really wanted to make sure we got an early start next time, to make sure we weren’t packaging chickens at 8pm.
- Get more knives – We had a lot of people helping us and we didn’t have enough for those that needed one.
- Get another awning for scalder and plucker – because of the rain, we really could have used one at those locations.
- Get a big plucker – We had way more chickens than a drill attachment could handle. We ended up hand plucking a lot of the chickens.
- Start on a Saturday – If something happens, you have an extra day to get it done.
- Look ahead for weather – If possible, plan for a good weather day.
- *Ducks* scald and pluck 2 min 45 seconds each – We had some ducks to process and ended up skinning them because of their thick down feathers.
- Catfish pliers help to remove the thick and stubborn feathers – Sometimes there are tail or wing feathers that don’t come out easily, especially on ducks.
- Stainless steel sheers to cut the necks – You can dull your knife if you use that.
- Long handled potato masher to hold the legs when scalding – We ended up getting rubber heat resistant gloves.
Would you add anything else to this list? Did I forget anything that you’d like me to explain? Let me know in the comments below.
Show your support and appreciation. If you did this project and found it helpful, give it a 5 star review and leave a comment. Follow me on Instagram @naturalliving.homestead then tag me in a photo of your project! Thank you!
SHOP THIS POST
Poultry Shears – All stainless steel because I’ve used poultry shears with a plastic handle and the handle broke before I was done using them.
Here are some other posts about raising meat birds if you want to learn more.
How to Butcher Quail – Step-by-Step Process for Beginners
Raising Meat Chickens: Getting Ready
Want to see videos on How-To Animal Butchering? Like Turkey’s, Pigs and Cows?
Abundance Plus has a whole library of How-To videos for these things and more. Want to learn more? Head on over to this link.
Pin It for Later!

This is really helpful thanks Very interested in pigs. Ducks. Too