Learn how to butcher quail with this step by step process for beginners. This is an easy and quick way to get some meat in your fridge or freezer for your next meal.
Why you Should Raise and Butcher Quail
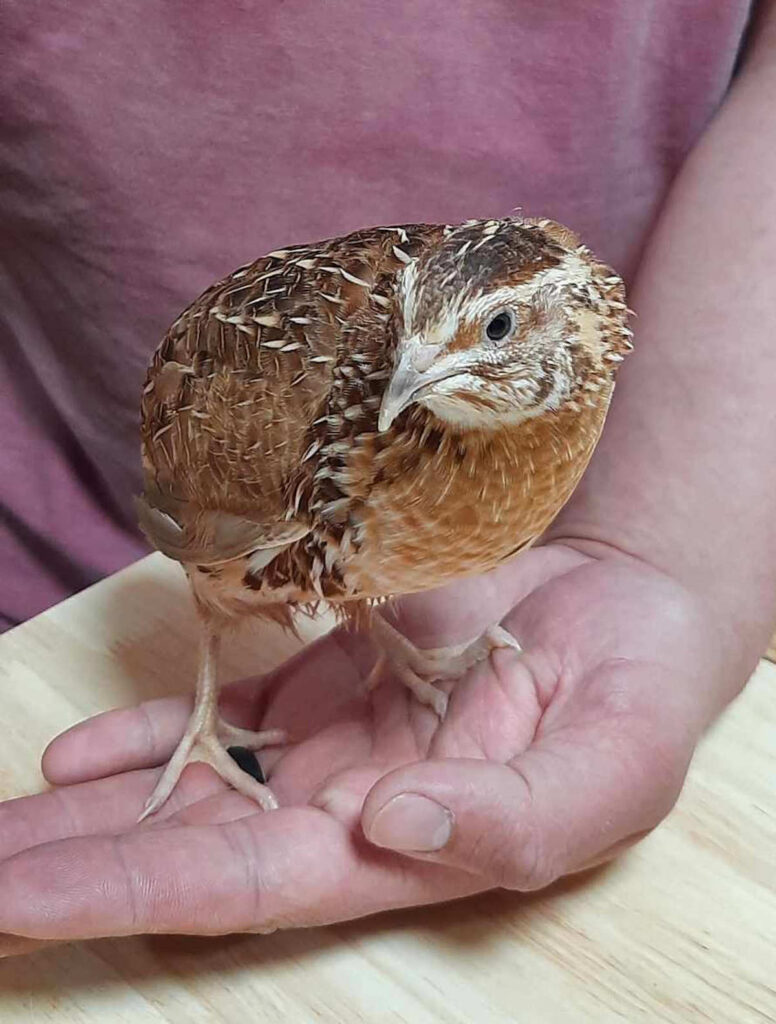
Raising quail for meat is a great way for you to have fresh meat on hand whenever you need it. Quail are pretty quiet birds, and with their small size they are very easy to handle. This makes it possible for almost anyone to raise them when backyard chickens are not an option due to the amount of noise they make and the amount of space they need. One of the main reasons people raise their own quail is because these birds are easy to raise for meat when your community has rules about having farm animals. They are also great for egg production. Quail eggs are quite small, so I use about 3 quail eggs to equal one chicken egg.
Where to Keep Your Quail
As opposed to raising meat chickens, raising quail for meat has multiple pros. One of these reasons is they can be raised almost anywhere on your property. Many people keep them in a quail hutch in barns, garage or even a porch.
Currently, we have ours in our unfinished basement in a repurposed hutch until the spring weather warms up enough that we can move them outside for fresh air and sunshine.
What age do you Butcher Quail?
For Coturnix Quail, anytime after 7 weeks you can harvest them for meat. For Bobwhite Quail, between 15 – 20 weeks depending on their size.
What is the Best Quail for Butchering?
Coturnix Quail is the best breed to raise for meat. They are also good for eggs. Coturnix Quail mature quickly and don’t require a lot of space and are great for beginners. By 7 weeks of age they can start laying eggs, mature females can lay up to 300 eggs a year. They can be processed anytime after 7 weeks of age when they have reached their full size.
The common breeds of quail to raise are the Coturnix Quail and the Bobwhite Quail. The Coturnix Quail tends to be the most popular breed because of how fast they mature. It is also much easier to sex them going by the colors of their feathers. The Bobwhite Quail is much harder to sex, because, as the name suggests, they are mostly white so there isn’t much to go off of.
How to Butcher Quail
Prior to processing your quail, if you can plan it far enough ahead of time, it would be best to remove their food 12 – 24 hours prior to processing them. This helps clean out their body and also makes for cleaner processing. Then you won’t have to deal with feces getting on your meat or work surface.
First step, you will want to gather your tools to butcher quail
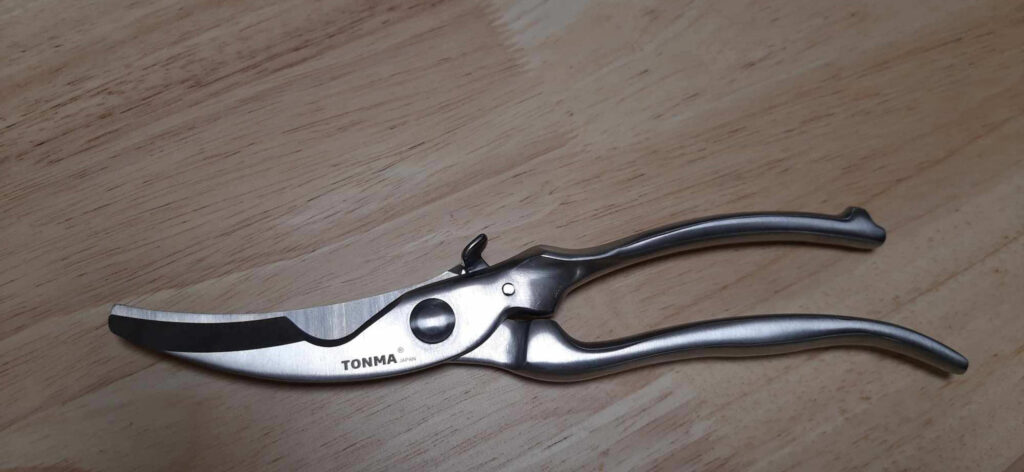
You will need some heavy duty processing shears and a sharp knife. We find the best tool to use are these processing shears. We find it easiest using our kitchen sink to process them in. We clean it out of any dishes and wash the sink clean. You may also want a cutting board if you plan to part the bird for cooking right away. If you are butchering quail for the first time, processing quail can be a daunting task. Just take your time to get things ready but with some patience, you can do this. The more you practice, it will get easier and eventually only take a couple of minutes to process.
Second step, kill and remove the head.
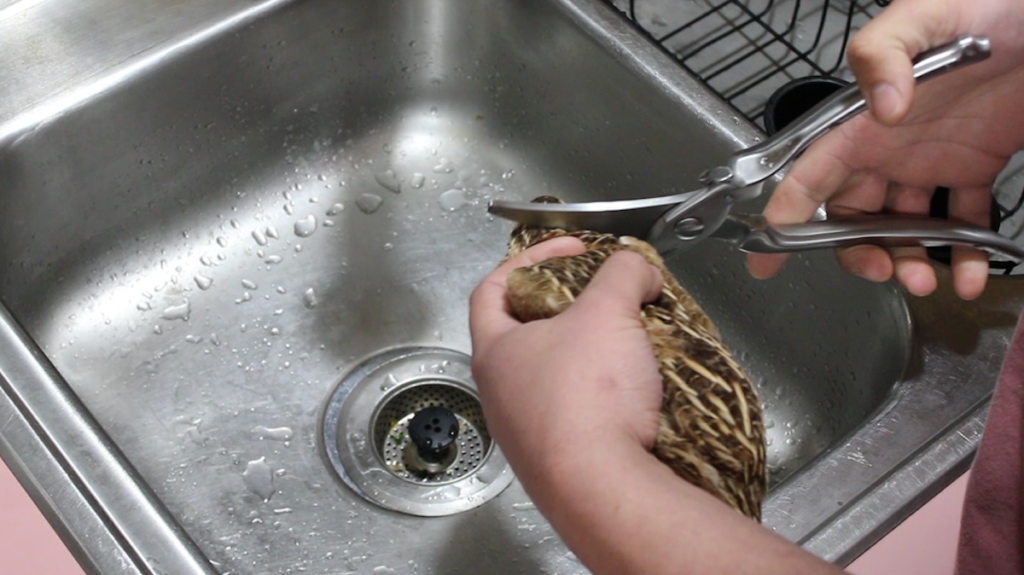
Hold the bird with one hand by putting the palm of your hand over the back so your thumb goes down one side over a wing and your other fingers go over the other side of the bird holding that wing down. If your unable to get a good hold of the bird with one hand, you can hold the bird down against the side or bottom of the sink while still holding down the wings.
Get your shears in your other hand and place the opening around the neck near the base of the head. With these shears, they have a oval cutout that makes for a good spot to place the neck in. Apply pressure to cut the neck to sever the spine. You may need to cut once or twice to cut through the feathers and skin. At this point the head should fall off, if not give a pull away from the body with the shears to remove it from any ligaments. Be sure to continue to hold the wings against it’s body, a nerve reaction may happen and it may start flapping their wings as they bleed out.
Third step, remove the wings and feet.
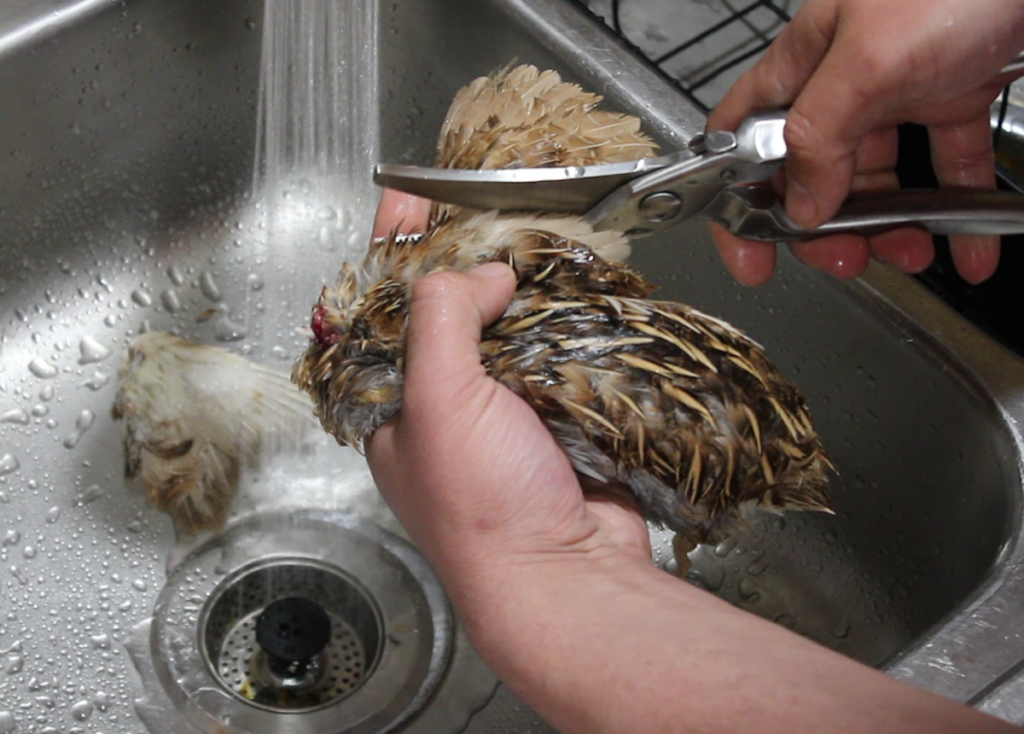
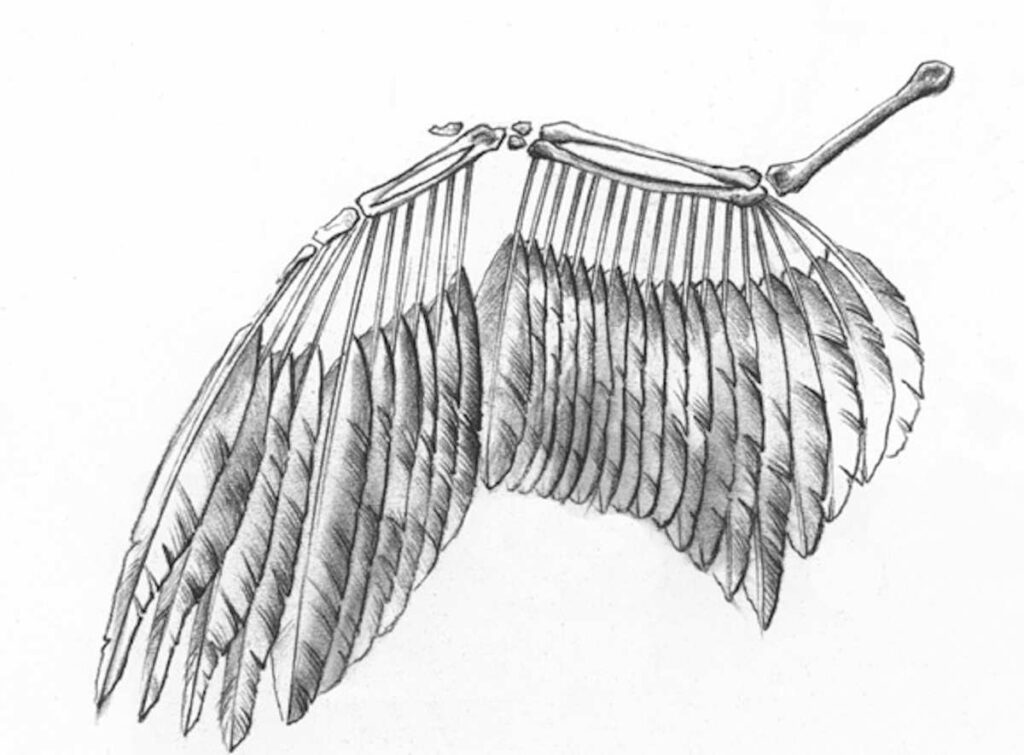
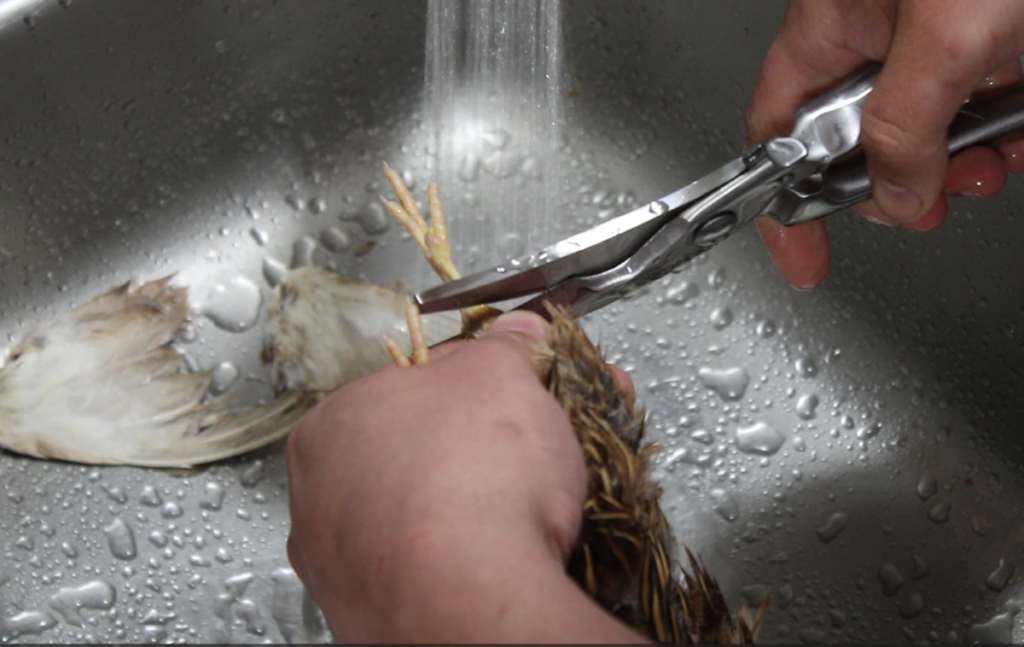
Once the wings have ceased flapping, you can cut the wings off. Spread the wing out and feel for where the elbow is. Cut at the joint. This way you get the most feathers off and can try to cut between bones and not dull the shears too much.
Now find the knee joint and cut right at the joint just like you did for the wings.
Fourth step, remove the skin/feathers from the body.
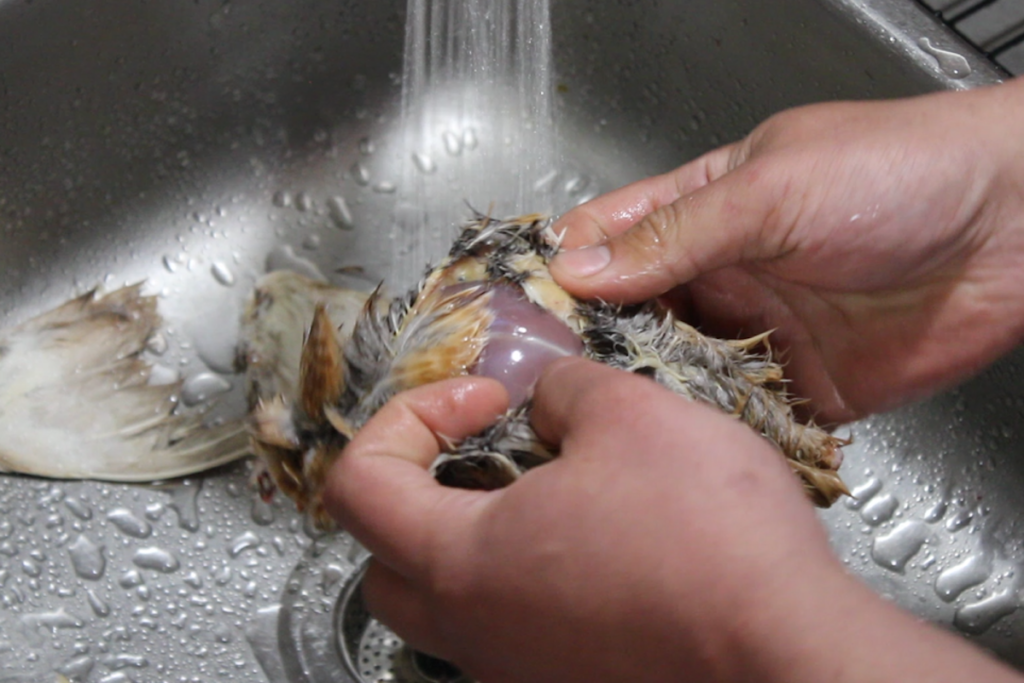
Now feel for the chest of the bird and make a hole in the skin to expose the meat. You can either use the shears or a sharp knife to cut into the skin. In this photo he used his hands to tear a hole through the skin.
Once your hole has been made, peel back the skin and start to pull it off the body. It may be easier to put your fingers between the meat and the skin to help pull the tissue and membranes away from the meat. Expose the chest and abdomen then start to pull away from the legs. You will want to get under the skin around the wings and knees since it’s a little harder to pull the tissue away from the bones there. Keeping your fingers under the skin also helps to keep the meat clean and free of feathers.
Finish pulling the skin away from the back and then the neck.
Fifth step, eviscerating, removing the organs.
Find the loose muscle on the abdomen below the breast bone and with a sharp knife (don’t cut too deep, you don’t want to pierce the intestines), make a slit and then with two hands pull the cavity open. This may be easiest by pulling the breast bone and the tail area of the spine away from each other.
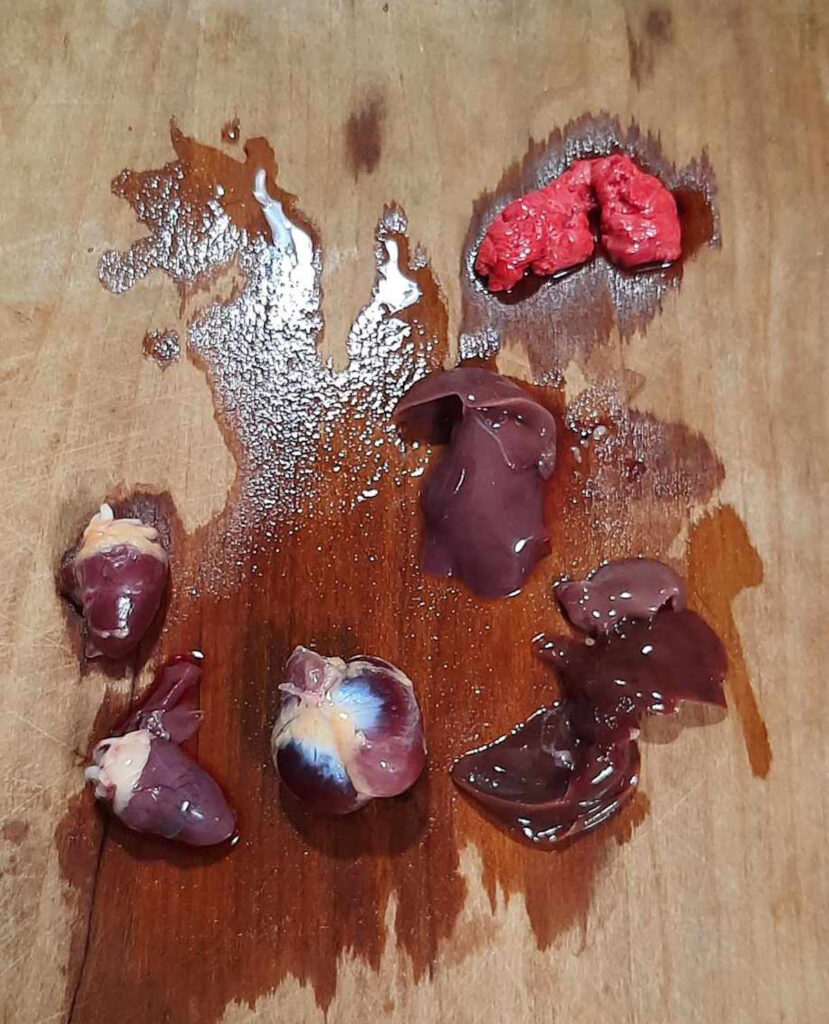
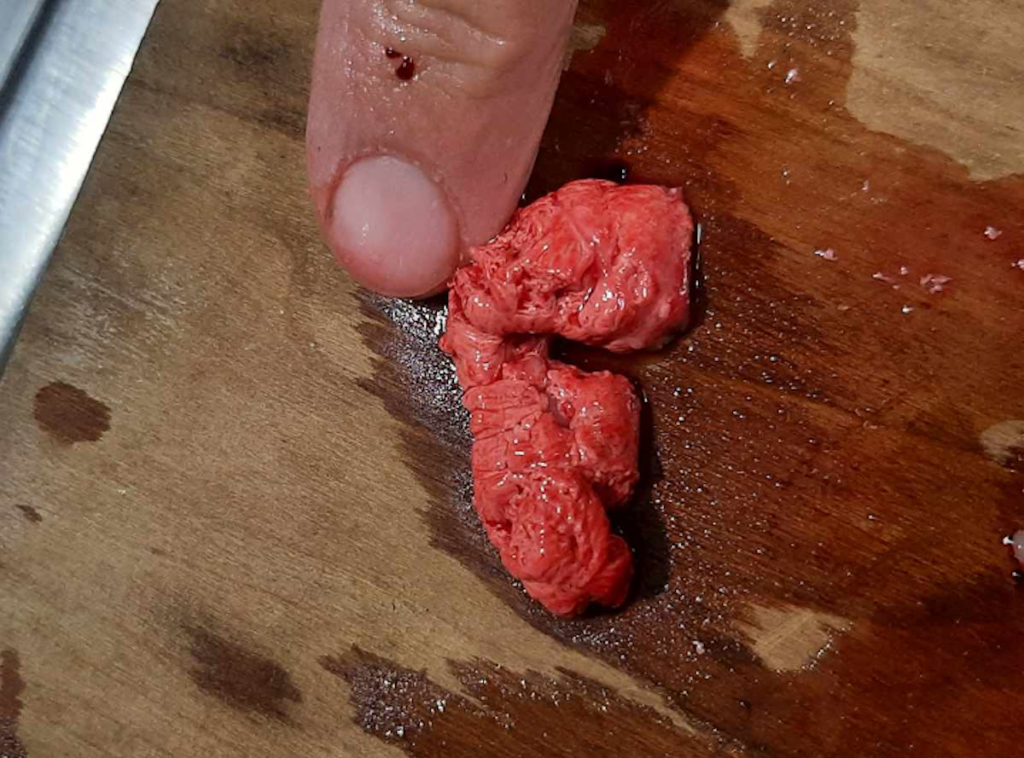
Now with one finger, reach in and hook your finger around the organs and gently pull out what you can. At this point you will probably get the intestines and the gizzard out. You will have to reach further in for the heart and lungs. The lungs can be a bit harder to get out because they rest flat up against the top part of the ribcage. At this point you can save any organs you want to keep, like the heart, liver and even the gizzard.
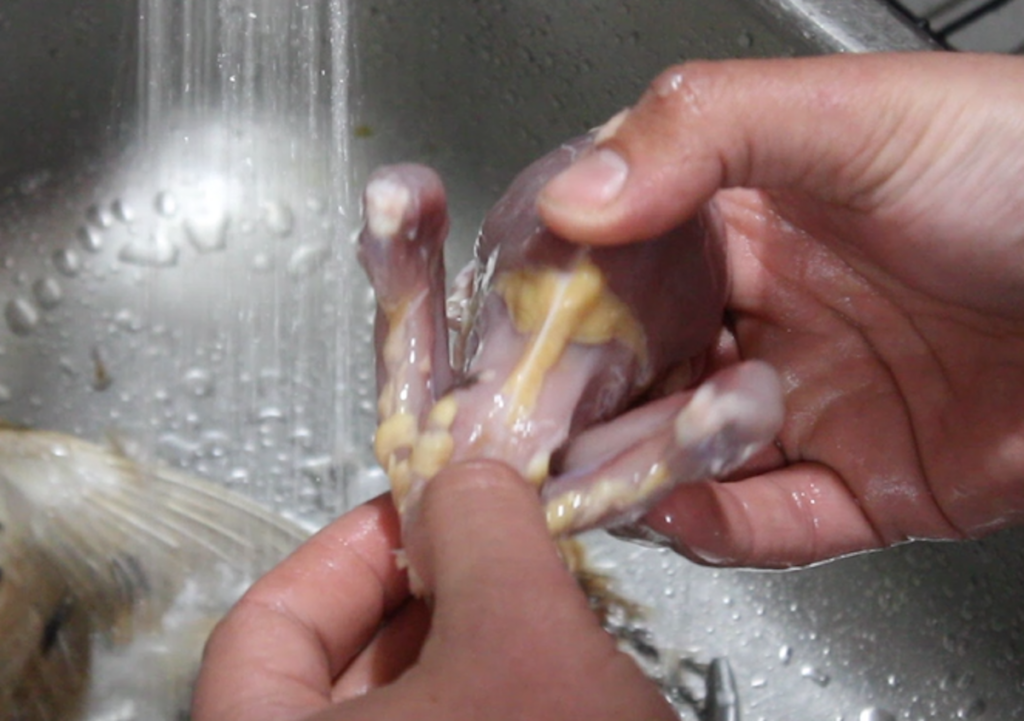
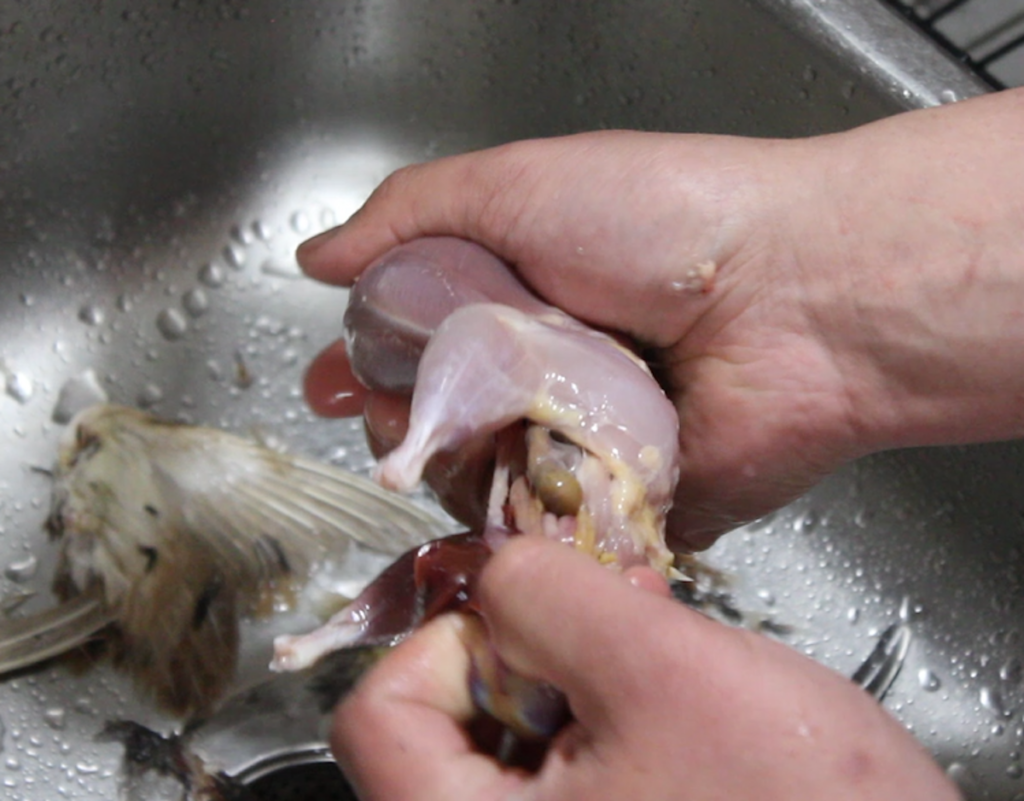
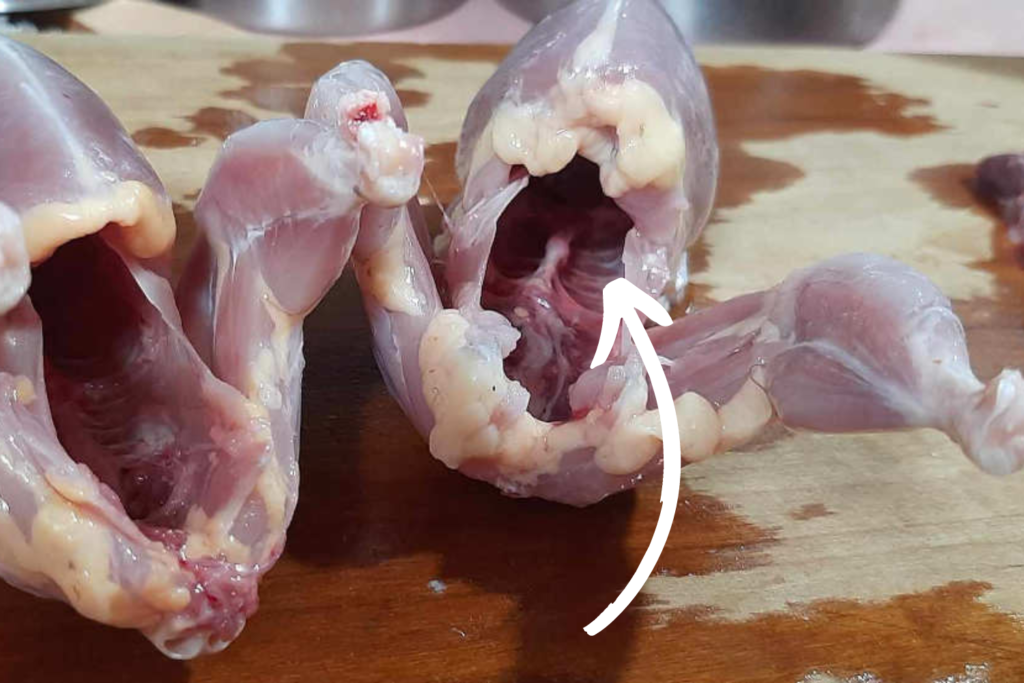
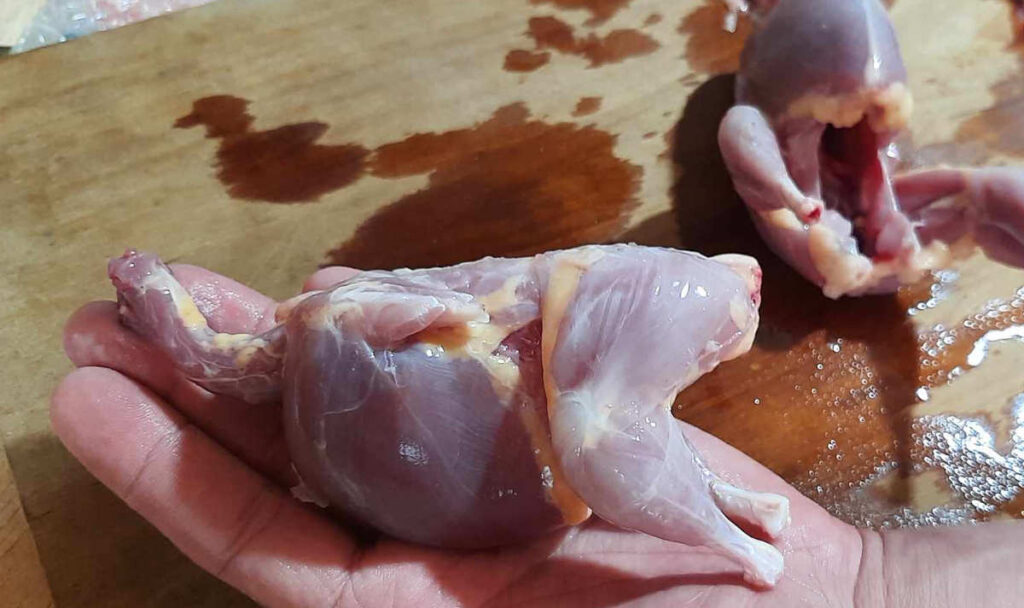
Once you have everything out the last step here is to remove the last bit of the intestines from the rectum. You can cut along the bone and cut the last bit of intestines out. Here, we just used the shears to cut the tail end of the spine and pelvis out. This gets the oil sack that is at the base of the spine and the intestines, since there isn’t much for meat there anyhow.
Rinse off the bird then use as desired, you can freeze or cook right away.
Brining Quail for Cooking
Quail meat can be a bit tough so you may want to brine your quail first to make the meat more tender. You will want to use a ratio of 1 tablespoon of salt per one cup of water. You may want to turn the bird occasionally to make sure the meat is covered in the brine.
You can brine your freshly processed quail or one that was thawed in the fridge in a salt water brine for as little as 30 minutes or up to 6 hours. Since the birds are so small they don’t need much time and may become too salty if left in the brine for too long.
How to store processed Quail
Store uncooked quail in fridge for 1-2 days. Keep in an airtight container.
You can wrap the birds in waxy butcher paper tightly or freezer-weight polyethylene bags. Store in the freezer and use within 6 months for the best quality.
Products mentioned to Butcher Quail
Printable DIY Card
Show your support and appreciation. If you did this project and found it helpful, give it a 5 star review and leave a comment. Follow me on Instagram @naturalliving.homestead then tag me in a photo of your project! Thank you!
How to Butcher Quail - Step-by Step Process for Beginners
Learn how to butcher quail with this step by step process for beginners. This is an easy and quick way to get some meat in your fridge or freezer for your next meal.
Materials
- Cutting Board if breaking down bird for cooking afterward.
Tools
- Heavy Duty Poultry Shears
- Sharp Knife
Instructions
How to Butcher Quail
Prior to processing your quail, if you can plan it far enough ahead of time, it would be best to remove their food 12 - 24 hours prior to processing them. This helps clean out their body and also makes for cleaner processing. Then you won't have to deal with feces getting on your meat or work surface.
- First step, you will want to gather your tools. You will need some heavy duty processing shears and a sharp knife. We find the best tool to use are these processing shears. We find it easiest using our kitchen sink to process them in. We clean it out of any dishes and wash the sink clean. You may also want a cutting board if you plan to part the bird for cooking right away. If you are butchering quail for the first time, processing quail can be a daunting task. Just take your time to get things ready but with some patience, you can do this. The more you practice, it will get easier and eventually only take a couple of minutes to process.
- Second step, kill and remove the head. Hold the bird with one hand by putting the palm of your hand over the back so your thumb goes down one side over a wing and your other fingers go over the other side of the bird holding that wing down. If your unable to get a good hold of the bird with one hand, you can hold the bird down against the side or bottom of the sink while still holding down the wings. Get your shears in your other hand and place the opening around the neck near the base of the head. With these shears, they have a oval cutout that makes for a good spot to place the neck in. Apply pressure to cut the neck to sever the spine. You may need to cut once or twice to cut through the feathers and skin. At this point the head should fall off, if not give a pull away from the body with the shears to remove it from any ligaments. Be sure to continue to hold the wings against it's body, a nerve reaction may happen and it may start flapping their wings as they bleed out.
- Third step, remove the wings and feet. Once the wings have ceased flapping, you can cut the wings off. Spread the wing out and feel for where the elbow is. Cut at the joint. This way you get the most feathers off and can try to cut between bones and not dull the shears too much. Now find the knee joint and cut right at the joint just like you did for the wings.
- Fourth step, remove the skin/feathers from the body. Now feel for the chest of the bird and make a hole in the skin to expose the meat. You can either use the shears or a sharp knife to cut into the skin. In this photo he used his hands to tear a hole through the skin. Once your hole has been made, peel back the skin and start to pull it off the body. It may be easier to put your fingers between the meat and the skin to help pull the tissue and membranes away from the meat. Expose the chest and abdomen then start to pull away from the legs. You will want to get under the skin around the wings and knees since it's a little harder to pull the tissue away from the bones there. Keeping your fingers under the skin also helps to keep the meat clean and free of feathers. Finish pulling the skin away from the back and then the neck.
- Fifth step, eviscerating, removing the organs. Find the loose muscle on the abdomen below the breast bone and with a sharp knife (don't cut too deep, you don't want to pierce the intestines), make a slit and then with two hands pull the cavity open. This may be easiest by pulling the breast bone and tail end of the spine away from each other. Now with one finger, reach in and hook your finger around the organs and gently pull out what you can. At this point you will probably get the intestines and the gizzard out. You will have to reach further in for the heart and lungs. The lungs can be a bit harder to get out because they rest flat up against the top part of the ribcage. At this point you can save any organs you want to keep, like the heart, liver and even the gizzard. Once you have everything out, the last step here is to remove the last bit of the intestines from the rectum. You can cut along the bone and cut the last bit of intestines out. Here, we just used the shears to cut the tail end of the spine and pelvis out. This gets the oil sack that is at the base of the spine and the intestines, since there isn't much for meat there anyhow. Rinse off the bird then use as desired, you can freeze or cook right away.
Notes
How to Store Quail
Store uncooked quail in fridge for 1-2 days. Keep in an airtight container.
You can wrap the birds in waxy butcher paper tightly or freezer-weight polyethylene bags. Store in the freezer and use within 6 months for the best quality.
Pin It for Later

Leave a Reply